RevUp Finance API Quick Start Guide - Asynchronous Flow
Objectives
This guide shows you how to use RevUp's APIs to manage invoices and upload proof of payments.
Note: This guide needs to be done step by step, and should be done in the order shown below.
Before You Begin
Prerequisites
- Active RevUp Finance account
- API Authorization token
- Supported file formats:
- Proof of Payment (PDF, JPG, PNG)
- Bank statements (GCASH, BPI, UBP)
High Level Flow
Note that this tutorial is for asynchronous flow. For synchronous flow, please refer to the Synchronous Call page.
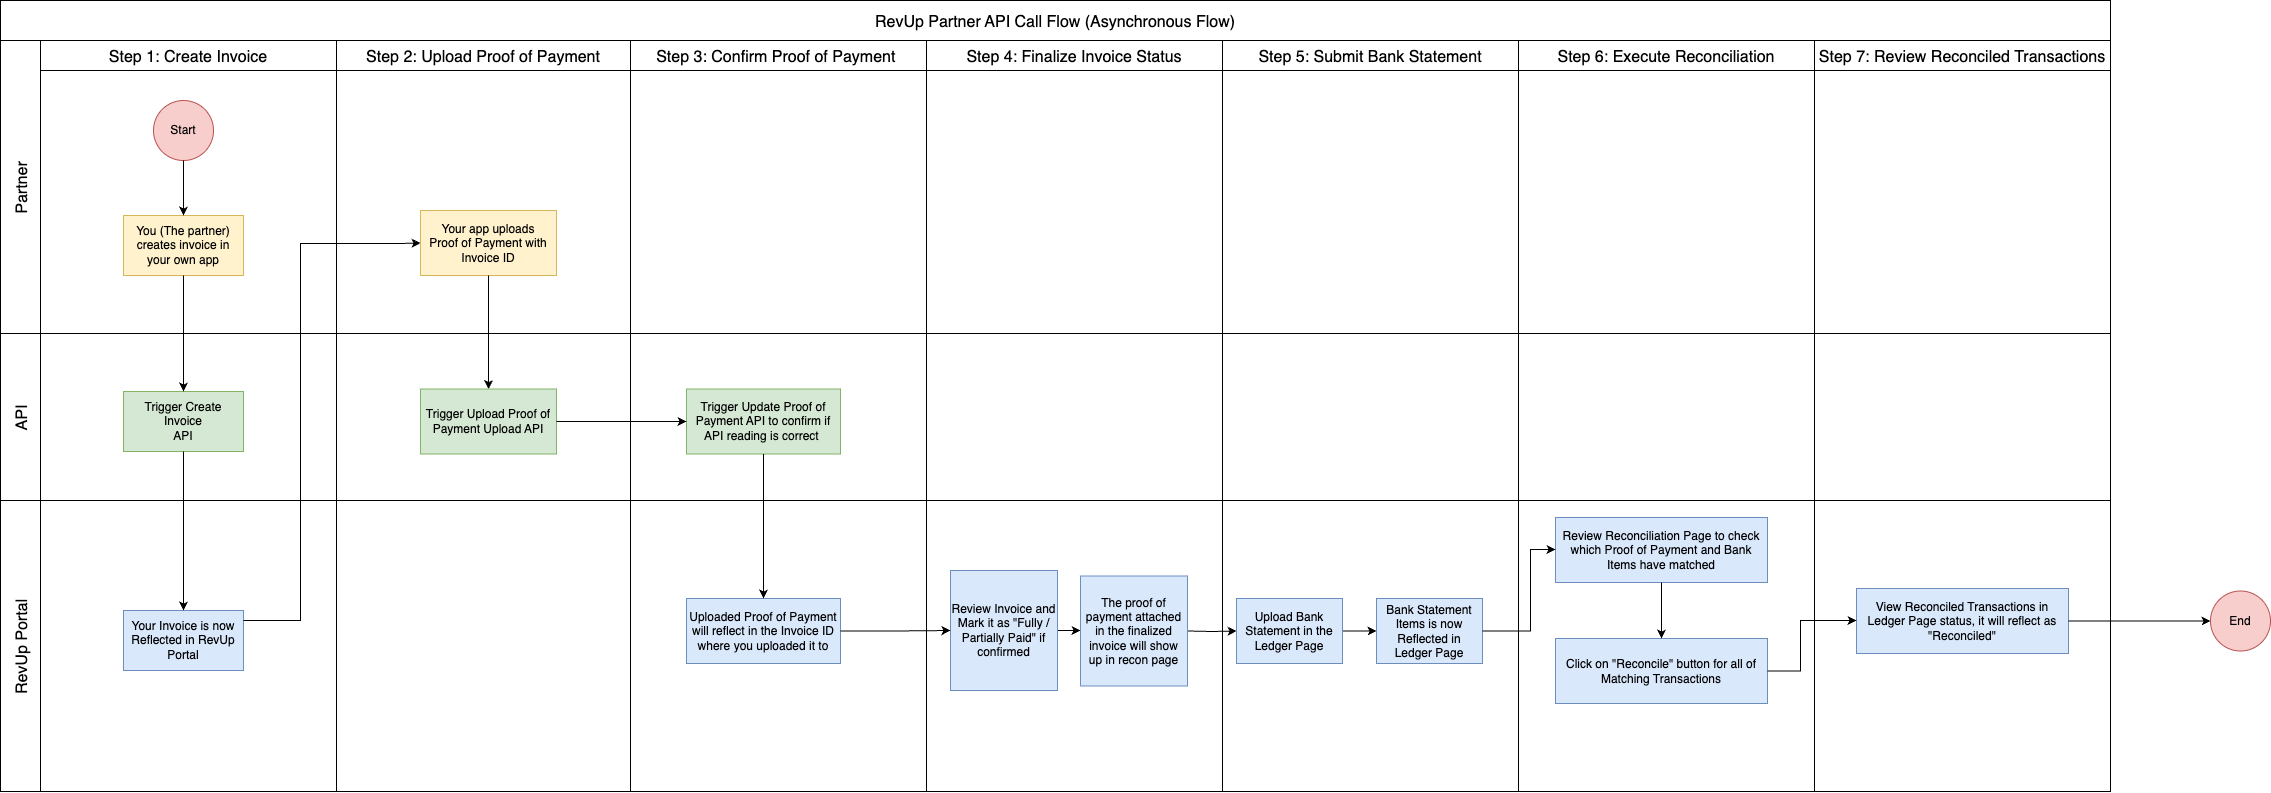
Required Permissions
- Invoice Management permissions
- Payment Processing access
- Bank reconciliation rights
Out of Scope
This tutorial is only going to use 3 API calls (Proof of Payment with Invoice). For this tutorial, we will not be using the other API calls. Especially uploading a bank statement and reconciling the proof of payment with the bank statement (which will be done manually).
Setting Up Your Environment
1. Authentication Setup
# Include in all API requests
x-api-key: <your-api-key>
2. API Base URL
Production: https://partner-api.revup.finance
Sandbox: https://partner-api-dev.revup.finance
3. Sample Files to test with:
Download the following files to be used for testing:
- Sample Bulk Invoice
- Sample GCash Proof of Payment
- Sample GCash Proof of Payment - 2
- Sample GCash Bank Statement
- Postman Collection
Note
This is the asynchronous flow. This means that you will first create an invoice, and then upload the proof of payment later. If you want to create an invoice and upload the proof of payment in the same call, you can read the Synchronous Flow page.
Create a new Invoice
Call the Create Invoice endpoint to create a new invoice.
POST /invoice

body:

{
    "number": "INV-001",
    "dueDate": "2024-09-30T14:15:22Z",
    "status": "DRAFT",
    "total": 1,
    "subTotal": 1,
    "items": [
        {
            "price": 51.68,
            "quantity": 1,
            "subTotal": 0,
            "total": 51.68
        }
    ],
    "customer": {
        "firstName": "John",
        "lastName": "Doe",
        "email": "john.doe@example.com",
    },
    "memo": "string",
    "attachPastDue": true,
    "createdDate": "2024-11-30T14:15:22Z" // replace with the current date
}
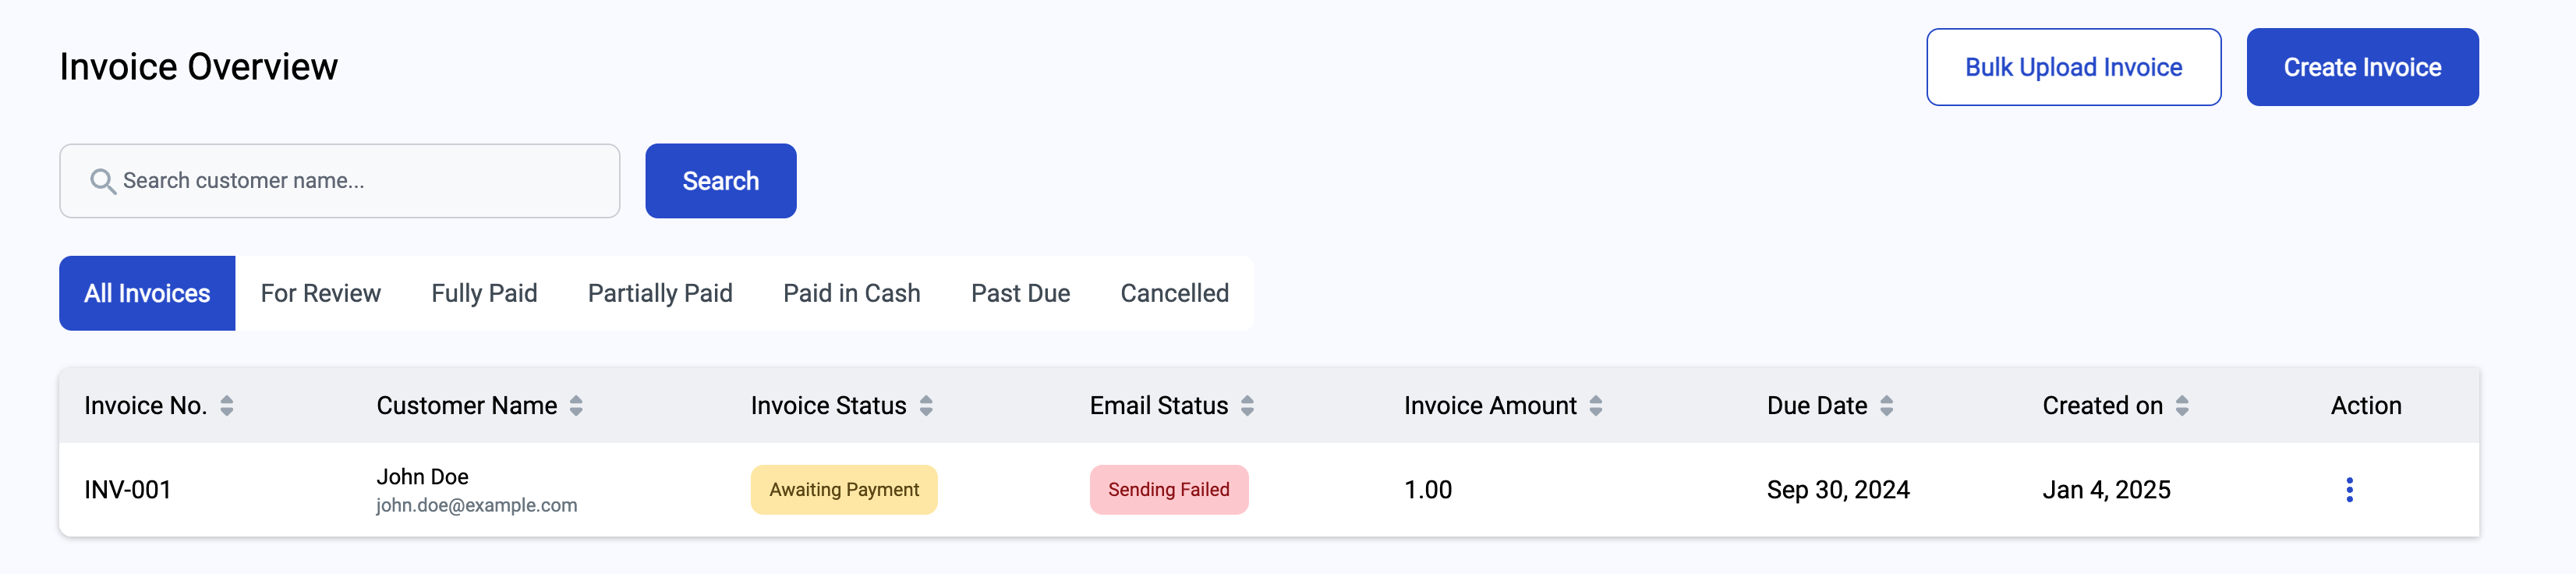
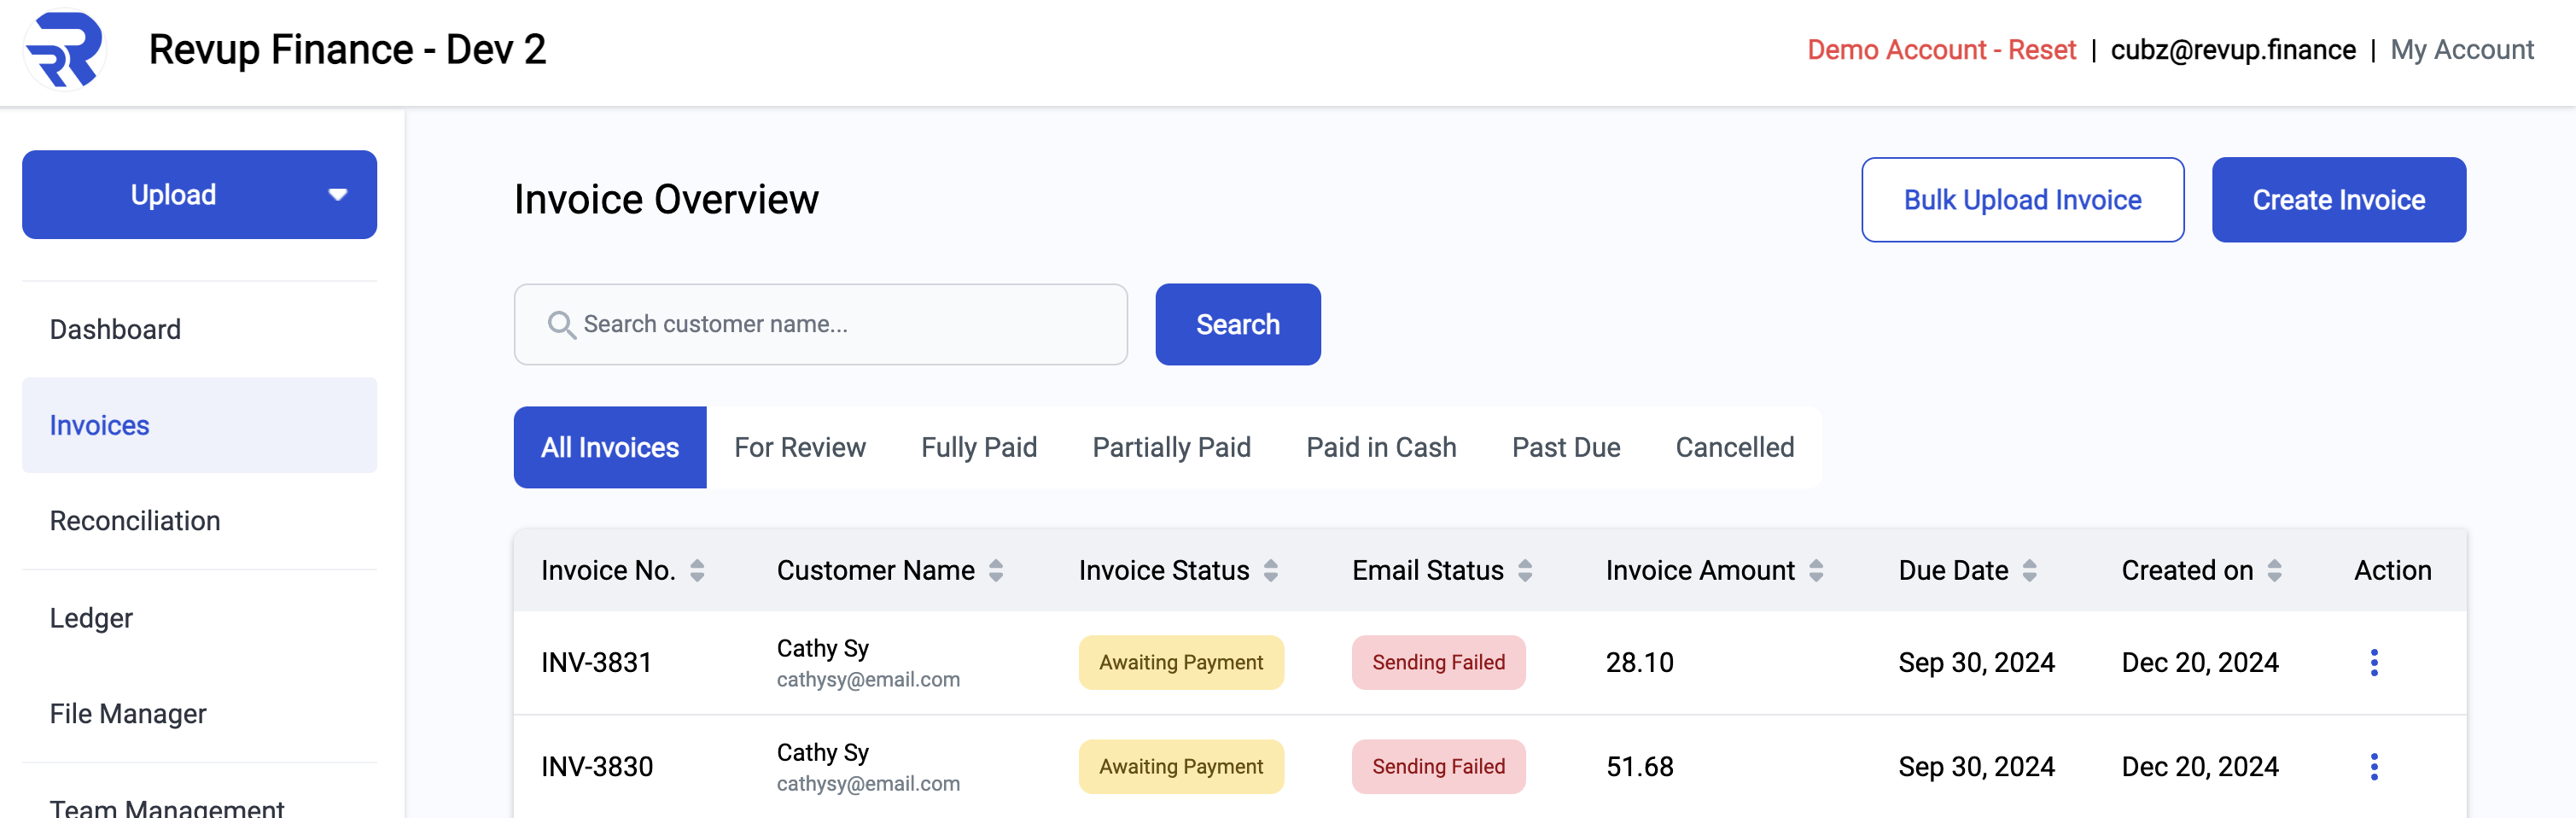
Once the invoice is created, you can see the invoice details in your RevUp Finance account. It will look like this:
Create Multiple Invoices using Bulk Upload (Optional)
You can also create multiple invoices at once by calling the Bulk Upload Invoices. You can download the sample bulk invoice file here.
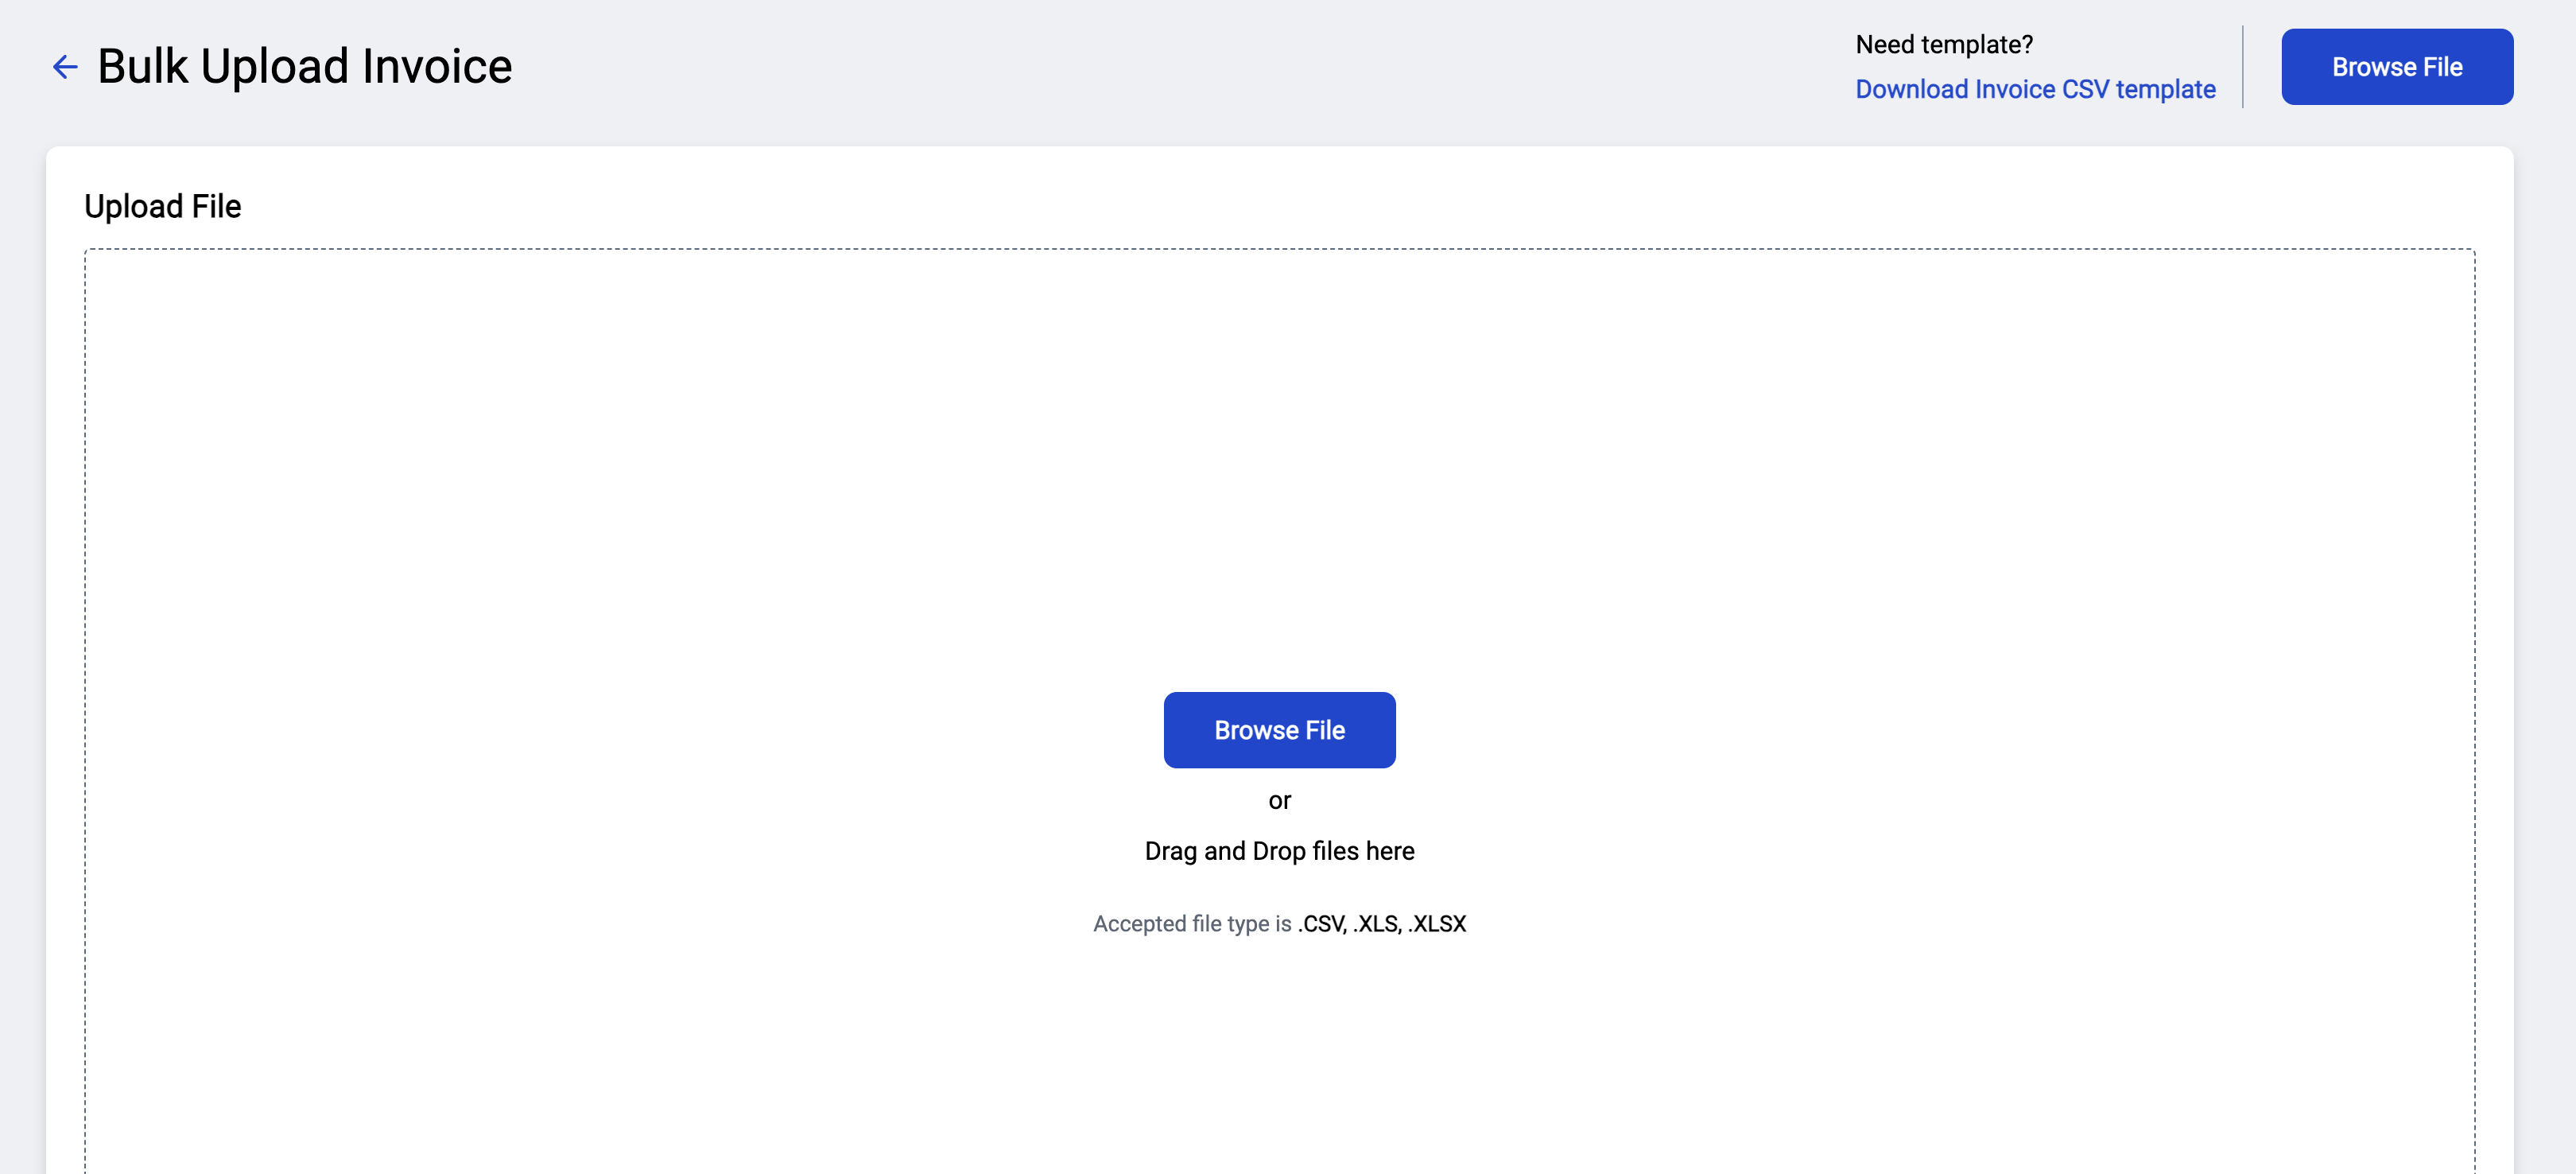
In the RevUp Finance portal, you can find the Bulk Upload Invoices button in the top right corner.

Then, select browse file and upload the sample bulk invoice file.
Once Uploaded, you will see a preview of the invoices that will be created.
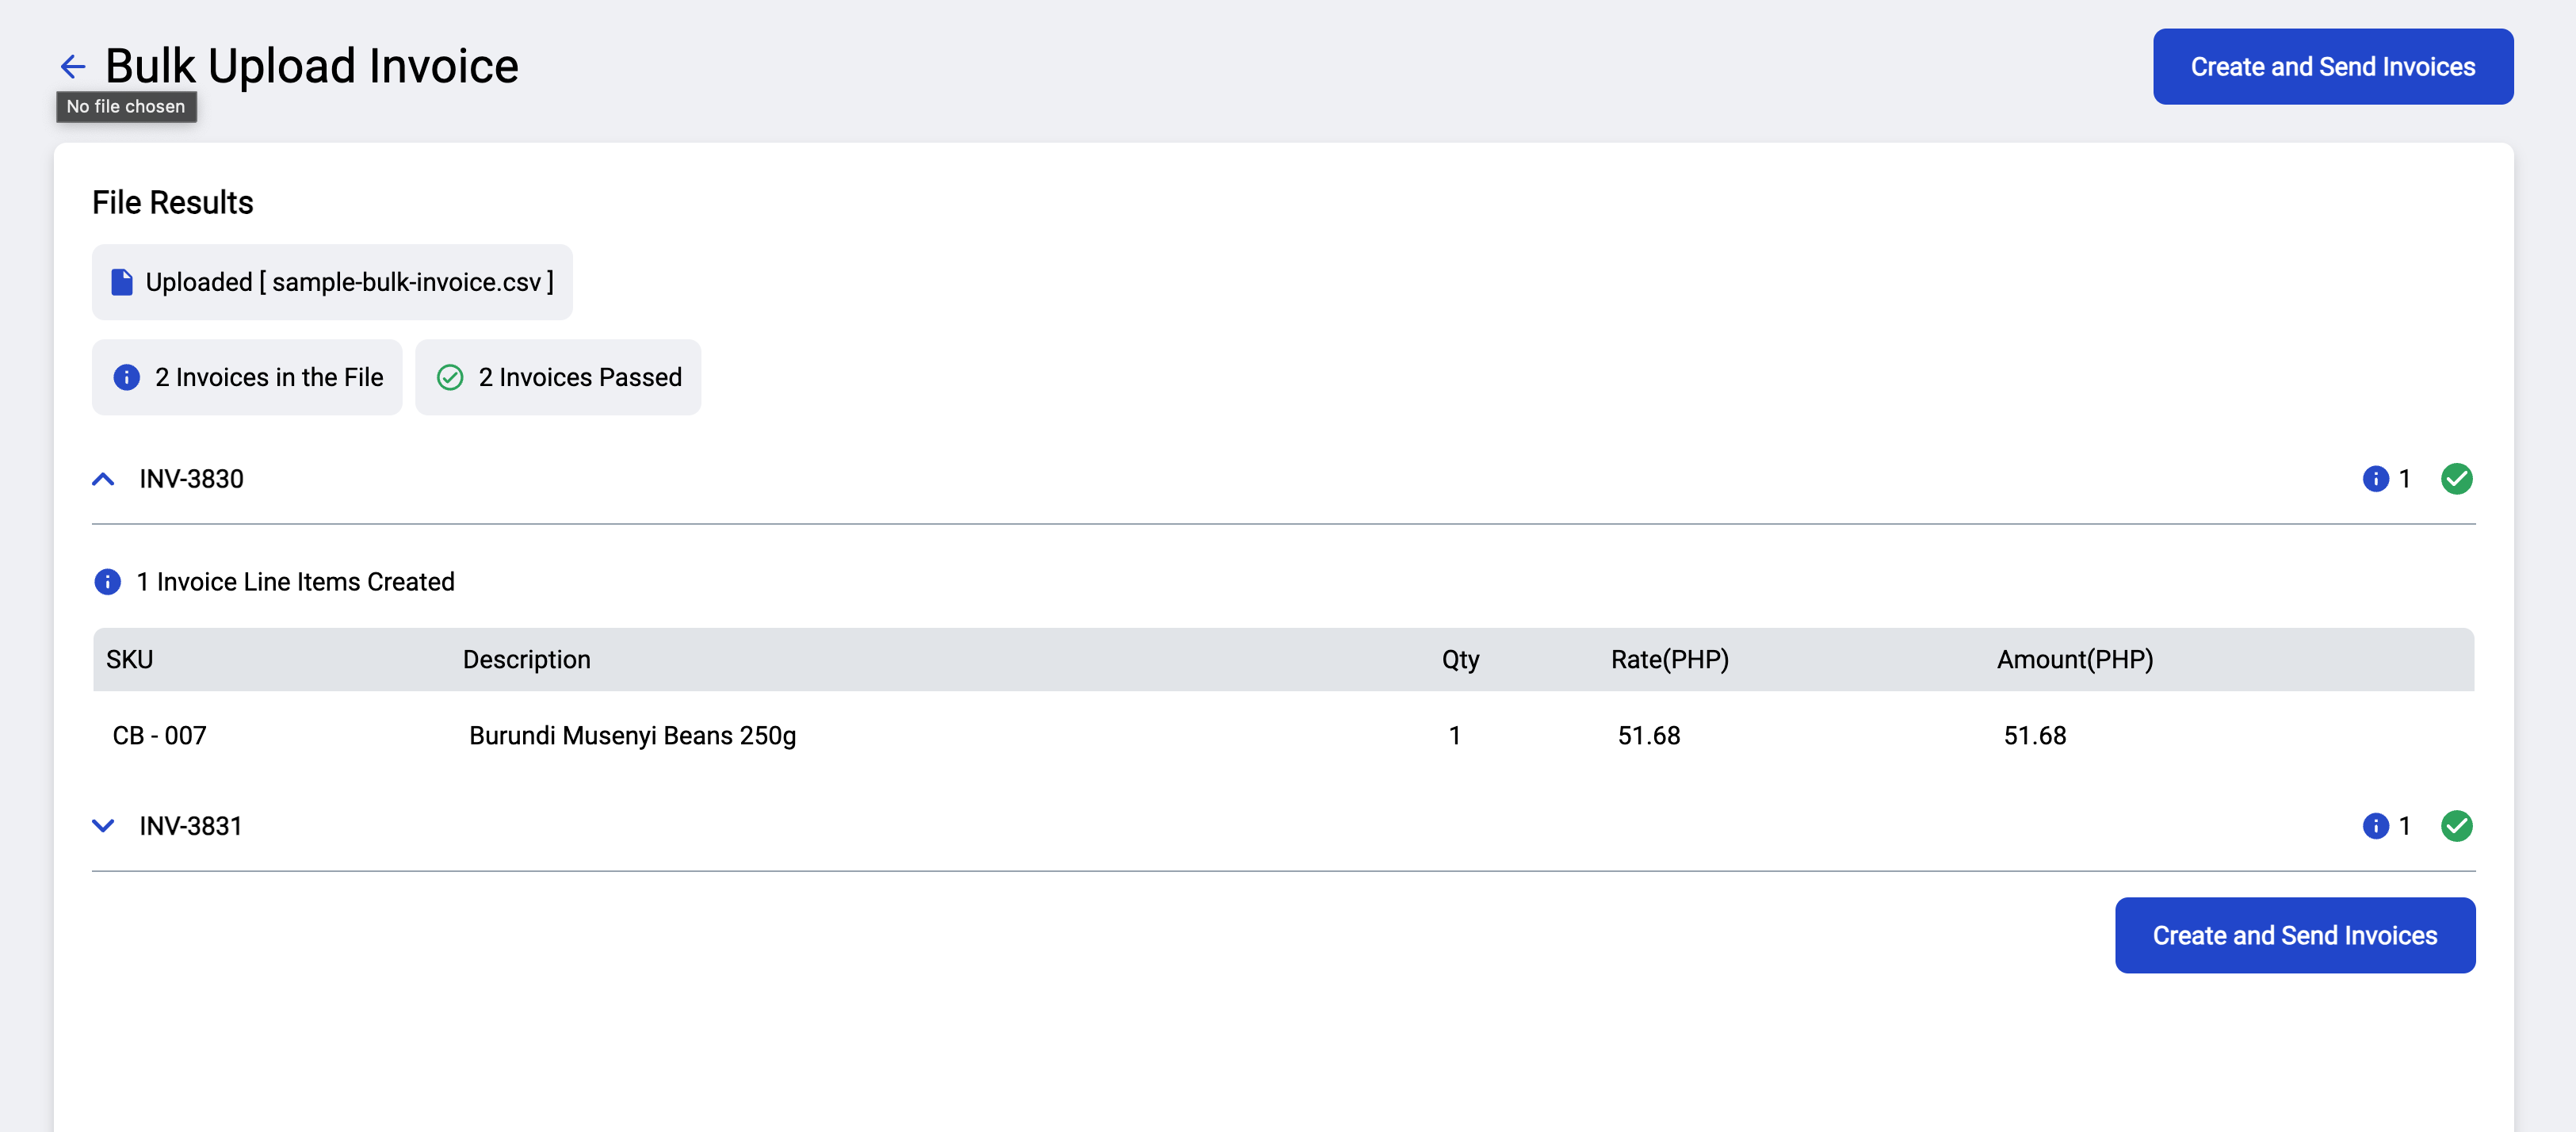
You can then click the Upload button to confirm the upload. And it will now show in the Invoices page in your RevUp Finance account.
Upload a Proof of Payment
The next step is to upload a proof of payment for the invoice. This is where your customer can upload a proof of payment to prove that they have paid the invoice.
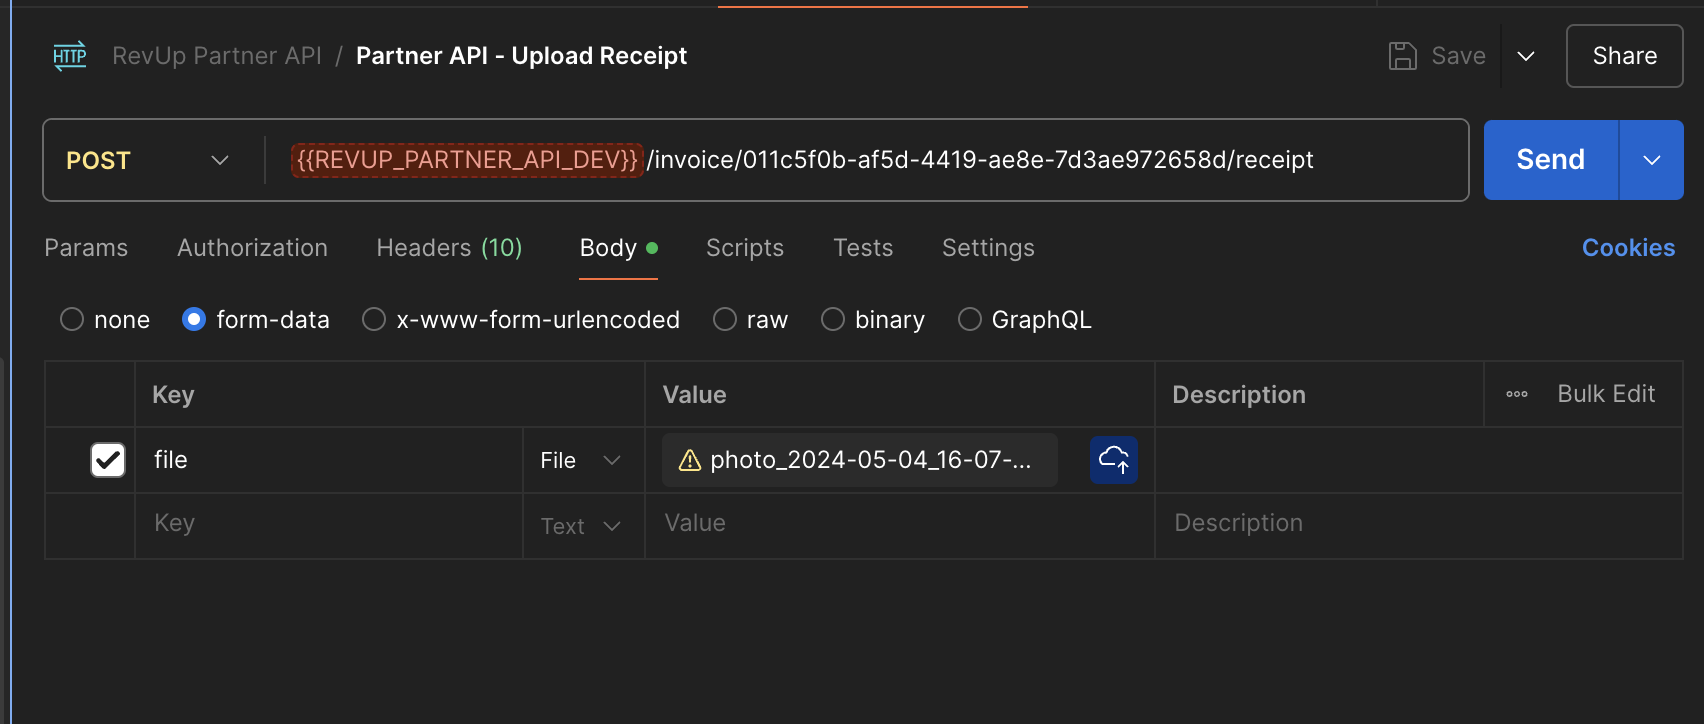
To do this, you can call the Upload Proof of Payment endpoint.
POST /invoices/{invoiceId}/proof-of-payment

format: form-data

body:
file: <sample-gcash-txn.jpg>
where {invoiceId} is the ID of the invoice you want to upload a proof of payment for.
Postman View:
Note: Once uploaded, the proof of payment will not be shown yet in your RevUp Finance account. The reason for this is you still need to validate if the proof of payment details from the API Call matches the details in the uploaded file.
When you validated the details of the proof of payment OCR, you can now update the status of the proof of payment to SUBMITTED.
PATCH /invoice/{invoiceId}/proof_of_payment

body:
[
    {
        // file_name is required
        "file_name": "ZPAZ_1734076916",
      }
]
You can also update the fields in the proof of payment by including the fields in the body of the request.
PATCH /invoice/{invoiceId}/proof_of_payment

body:
[
    {
        // file_name is required
        "file_name": "ZPAZ_1734076916",
        "pop_receiving_account_number": "0917 511 2228",
         "pop_receiving_bank_name": "GCash",
         "pop_receiving_mobile_number": "0917 511 2228",
         "pop_receiving_name": "LOE B.",
         "pop_sending_amount": "51.68",
         "pop_sending_bank_name": "GCash",
         "pop_sending_date": "May 4, 2024",
         "pop_sending_name": "Louie Bernardo",
         "pop_sending_reference_number": "7017238374839",
         "pop_sending_time": "12:38 PM",
         "account_number": "0917 511 2228",
         "proof_of_payment_bank_name": "GCash"
      }
]
Note: You cannot change the status of the proof of payment once the proof of payment is marked as
SUBMITTED.
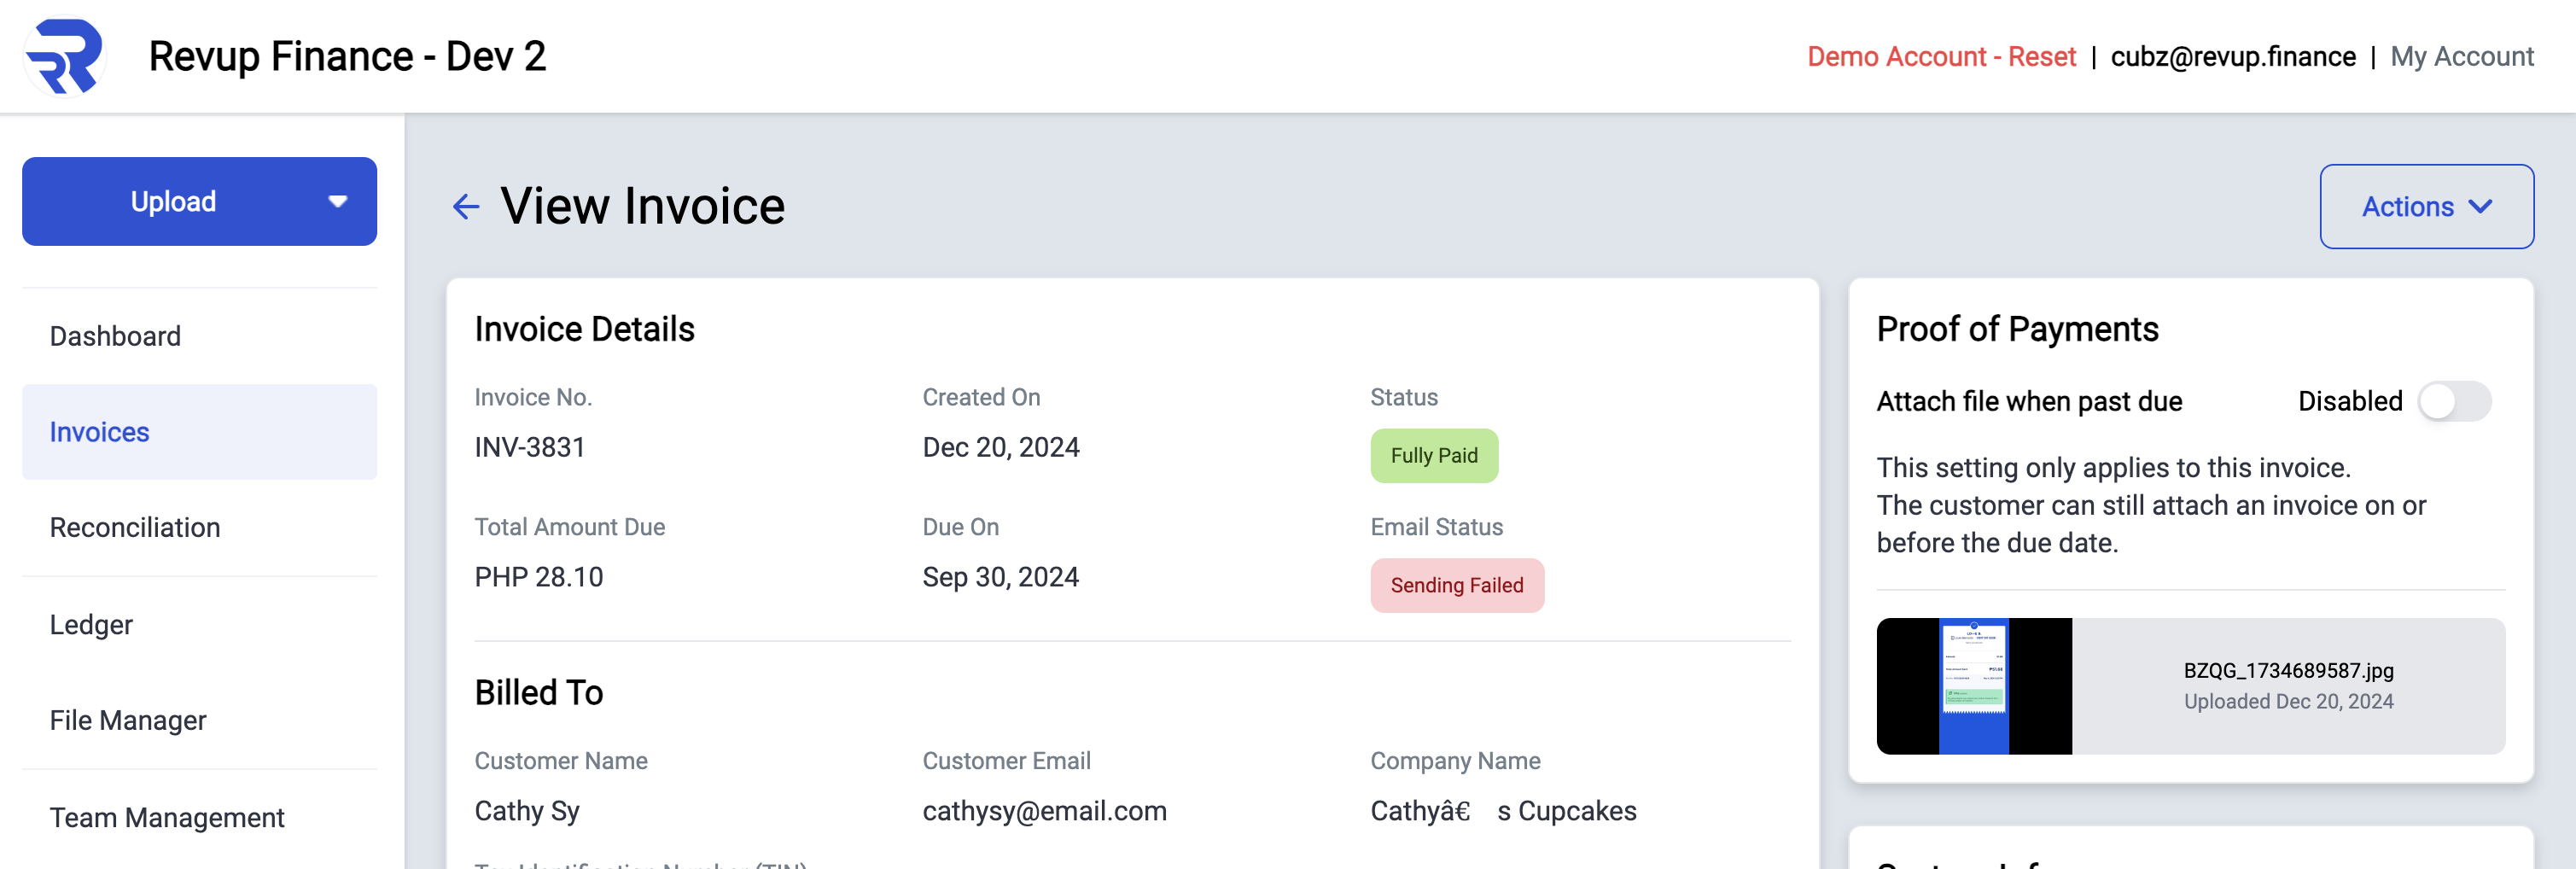
This will now show the proof of payment in the Invoice Details page in your RevUp Finance account.
Invoice Without proof of payment

Invoice With proof of payment

Notice that the invoice status is now marked as Under Review and the proof of payment is now shown in the invoice details.
Updating Invoice Status
Once the customer has uploaded proof of payment, you can now update the invoice status to PAID assuming that you have already confirmed the payment with the customer.
PATCH /invoices/{invoiceId}

body:
{
    "status": "PAID"
}
Once the invoice status is updated to PAID, the invoice will now be shown in the Paid Invoices section in your RevUp Finance account.
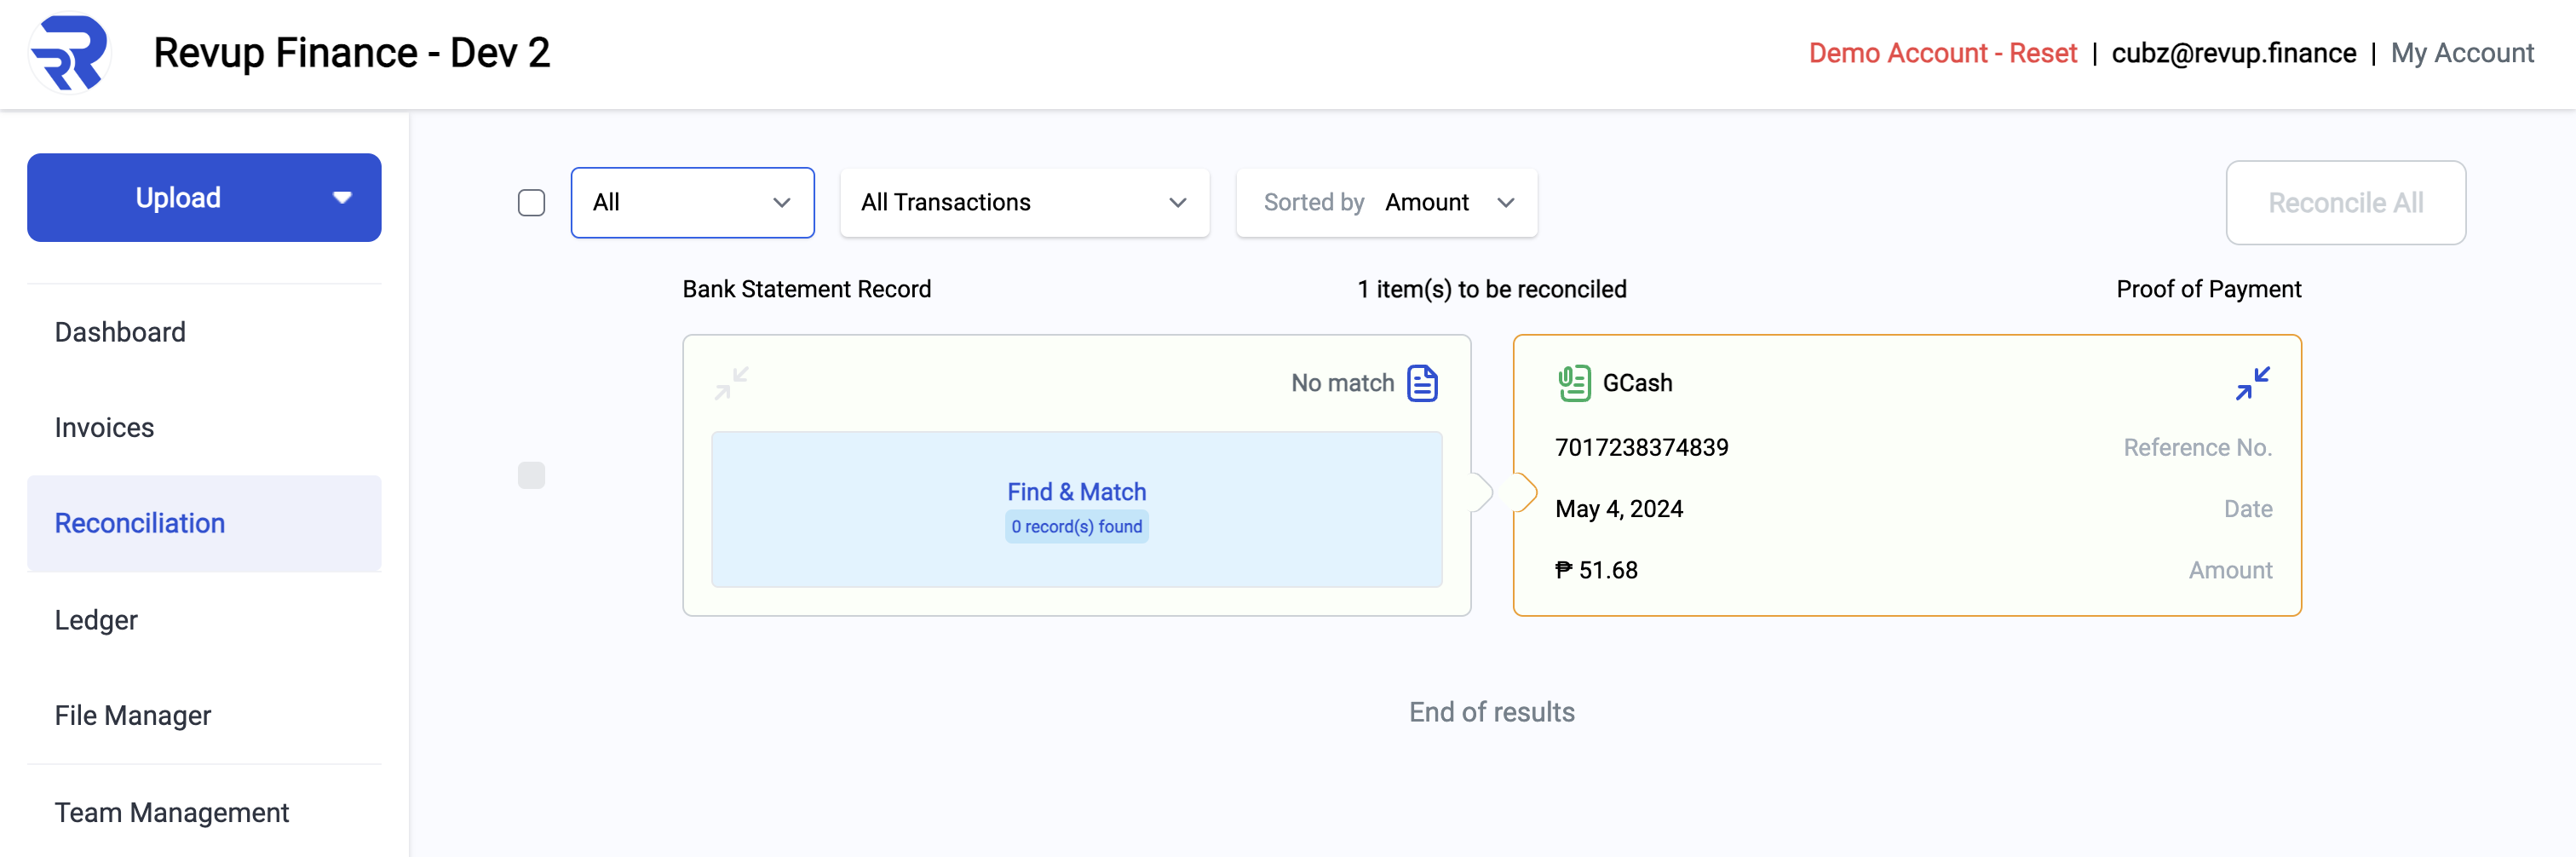
Upon marking the invoice as PAID, it will now also trigger the bank reconciliation process. Which reflects a new reconciliation record in your RevUp Finance account.
Upload a Bank Statement
Now that you have uploaded a proof of payment, you can now upload a bank statement to reconcile the payment with the bank statement.
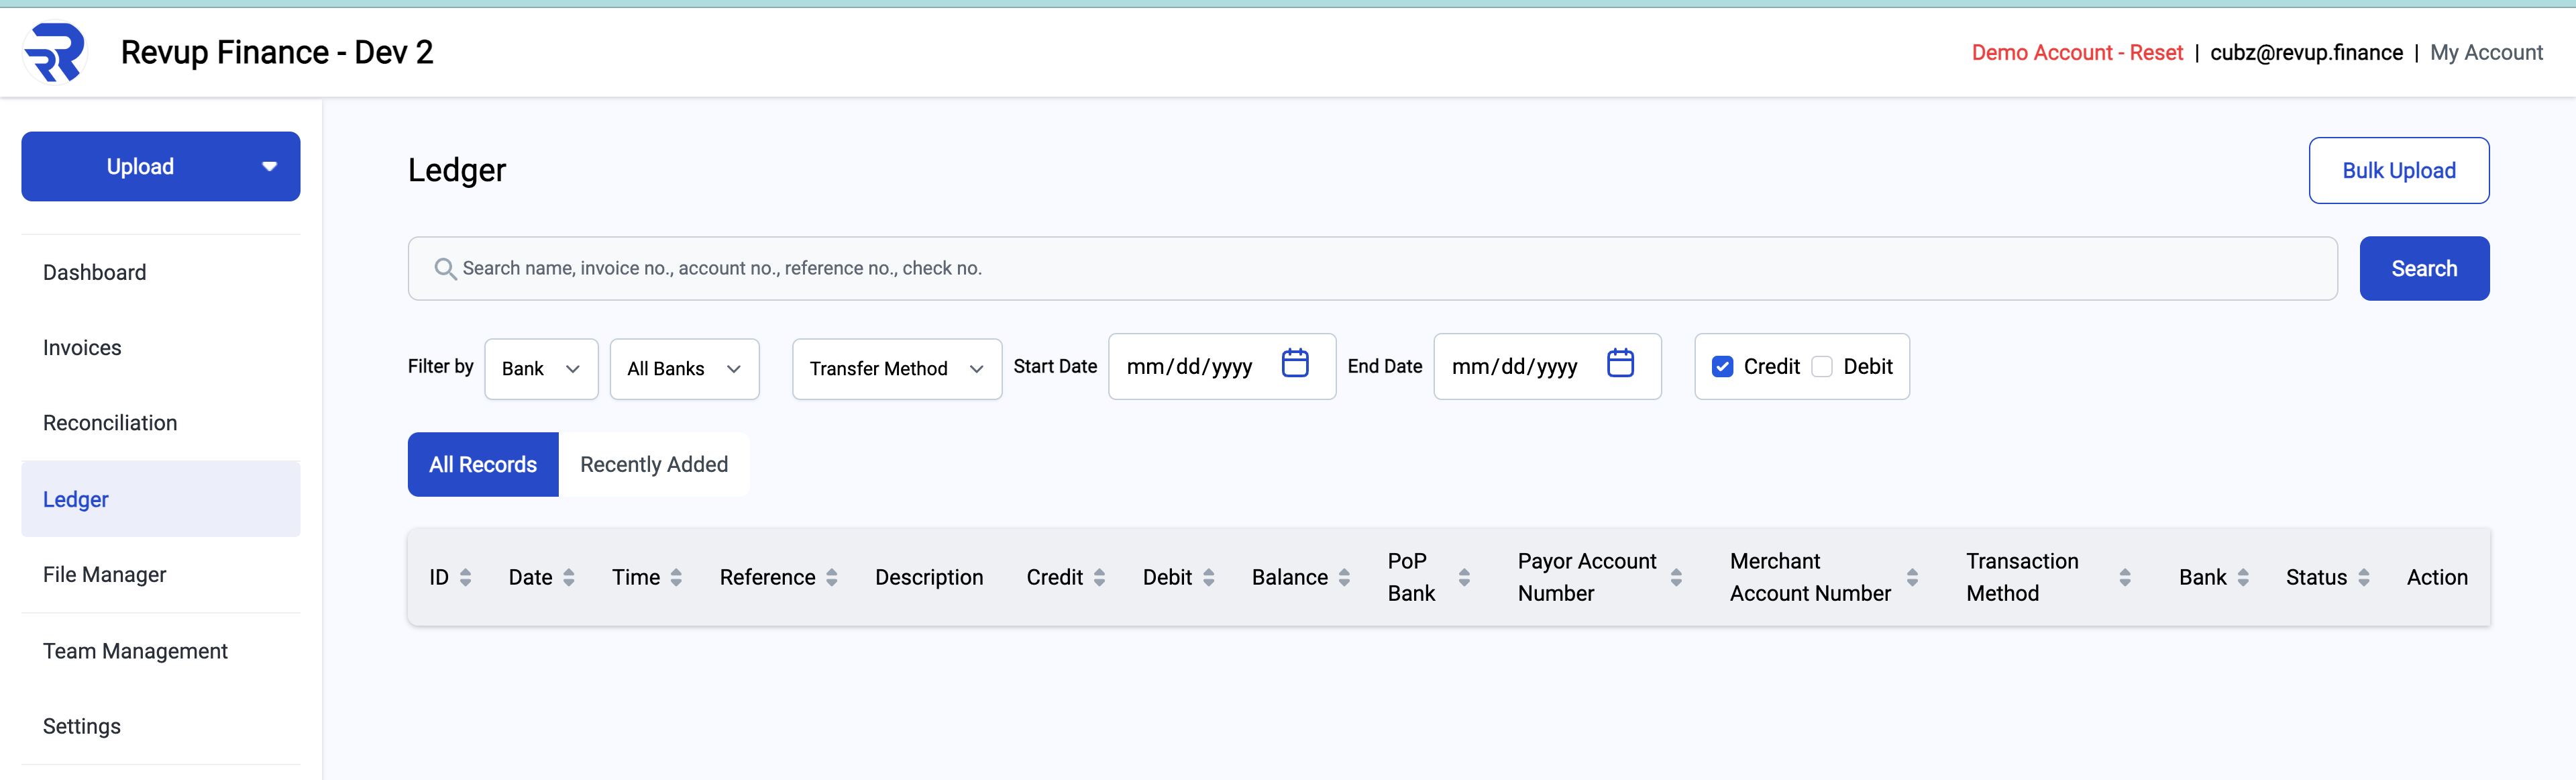
Go to the Ledger page in your RevUp Finance account and click the Bulk Upload button in the top right corner.
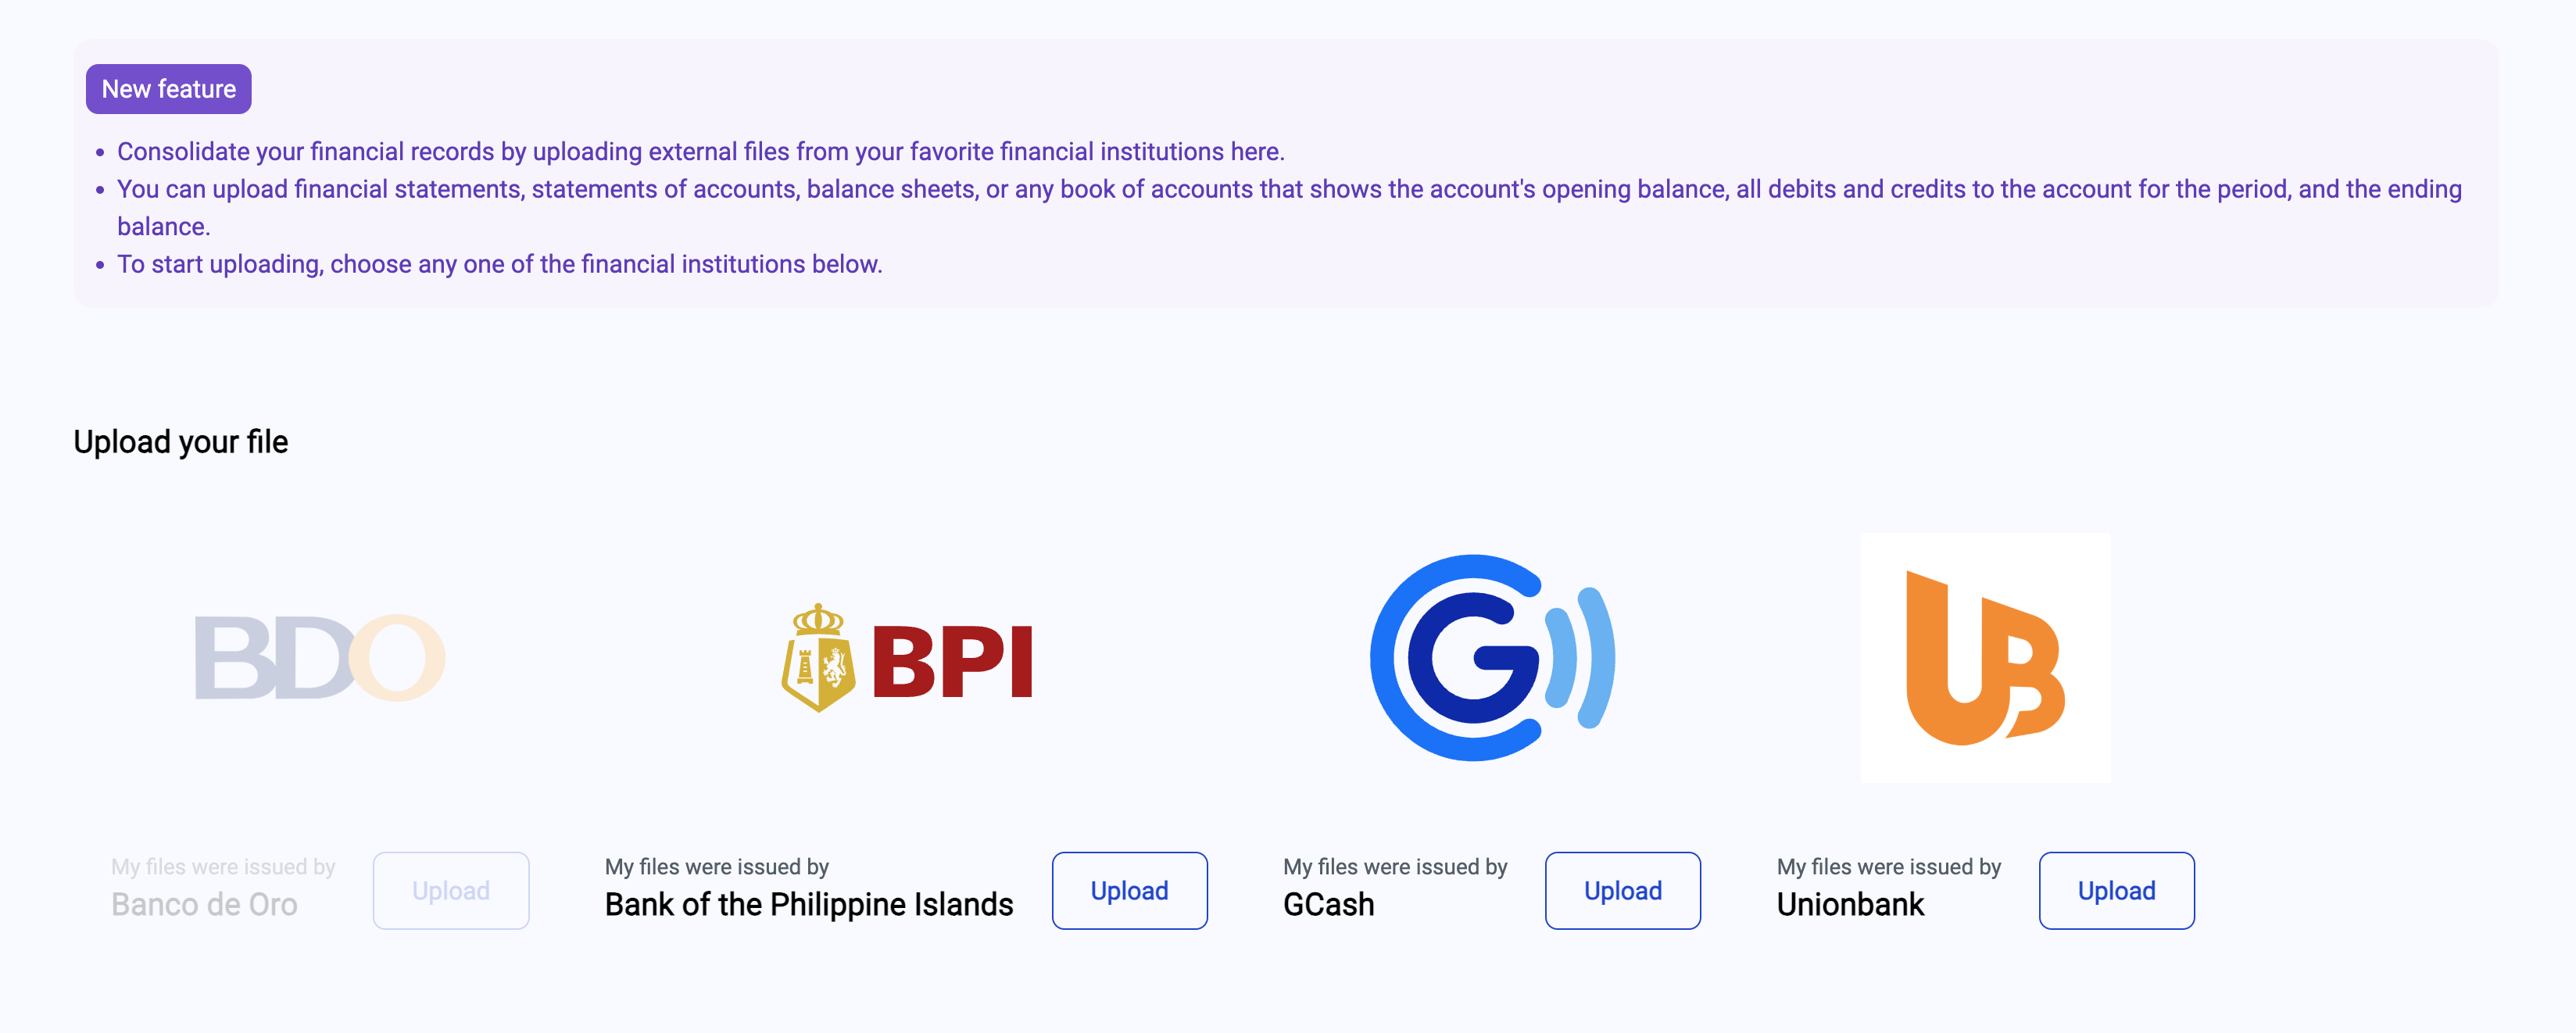
Then Select the type of bank statement file you want to upload. In this case, we will select GCash.
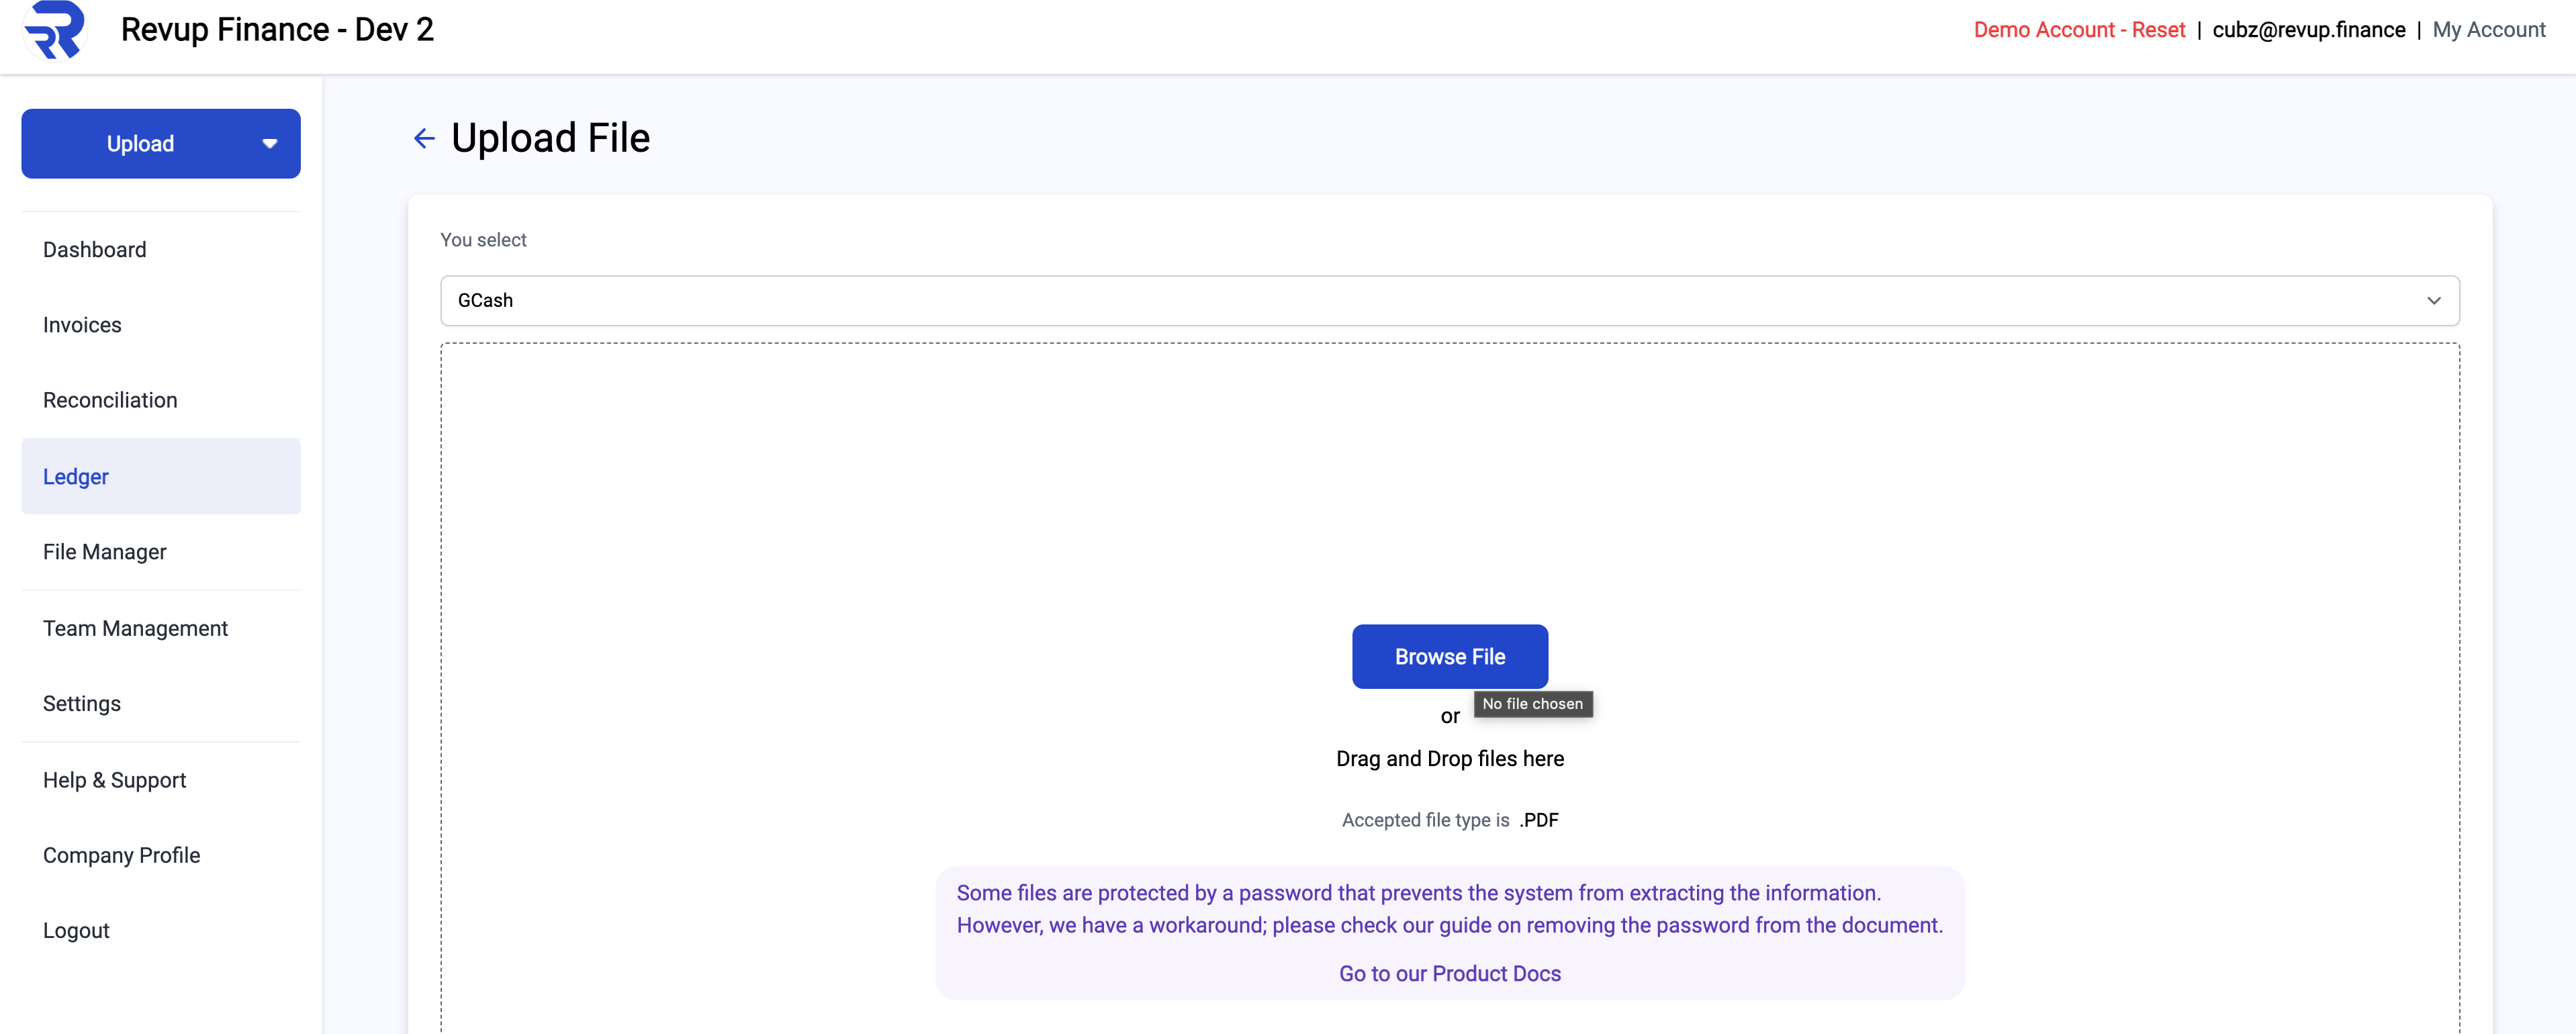
Then, select browse file and upload the sample bank statement file.
Then enter the password if there is one. In this case, the password is bernardo2228.
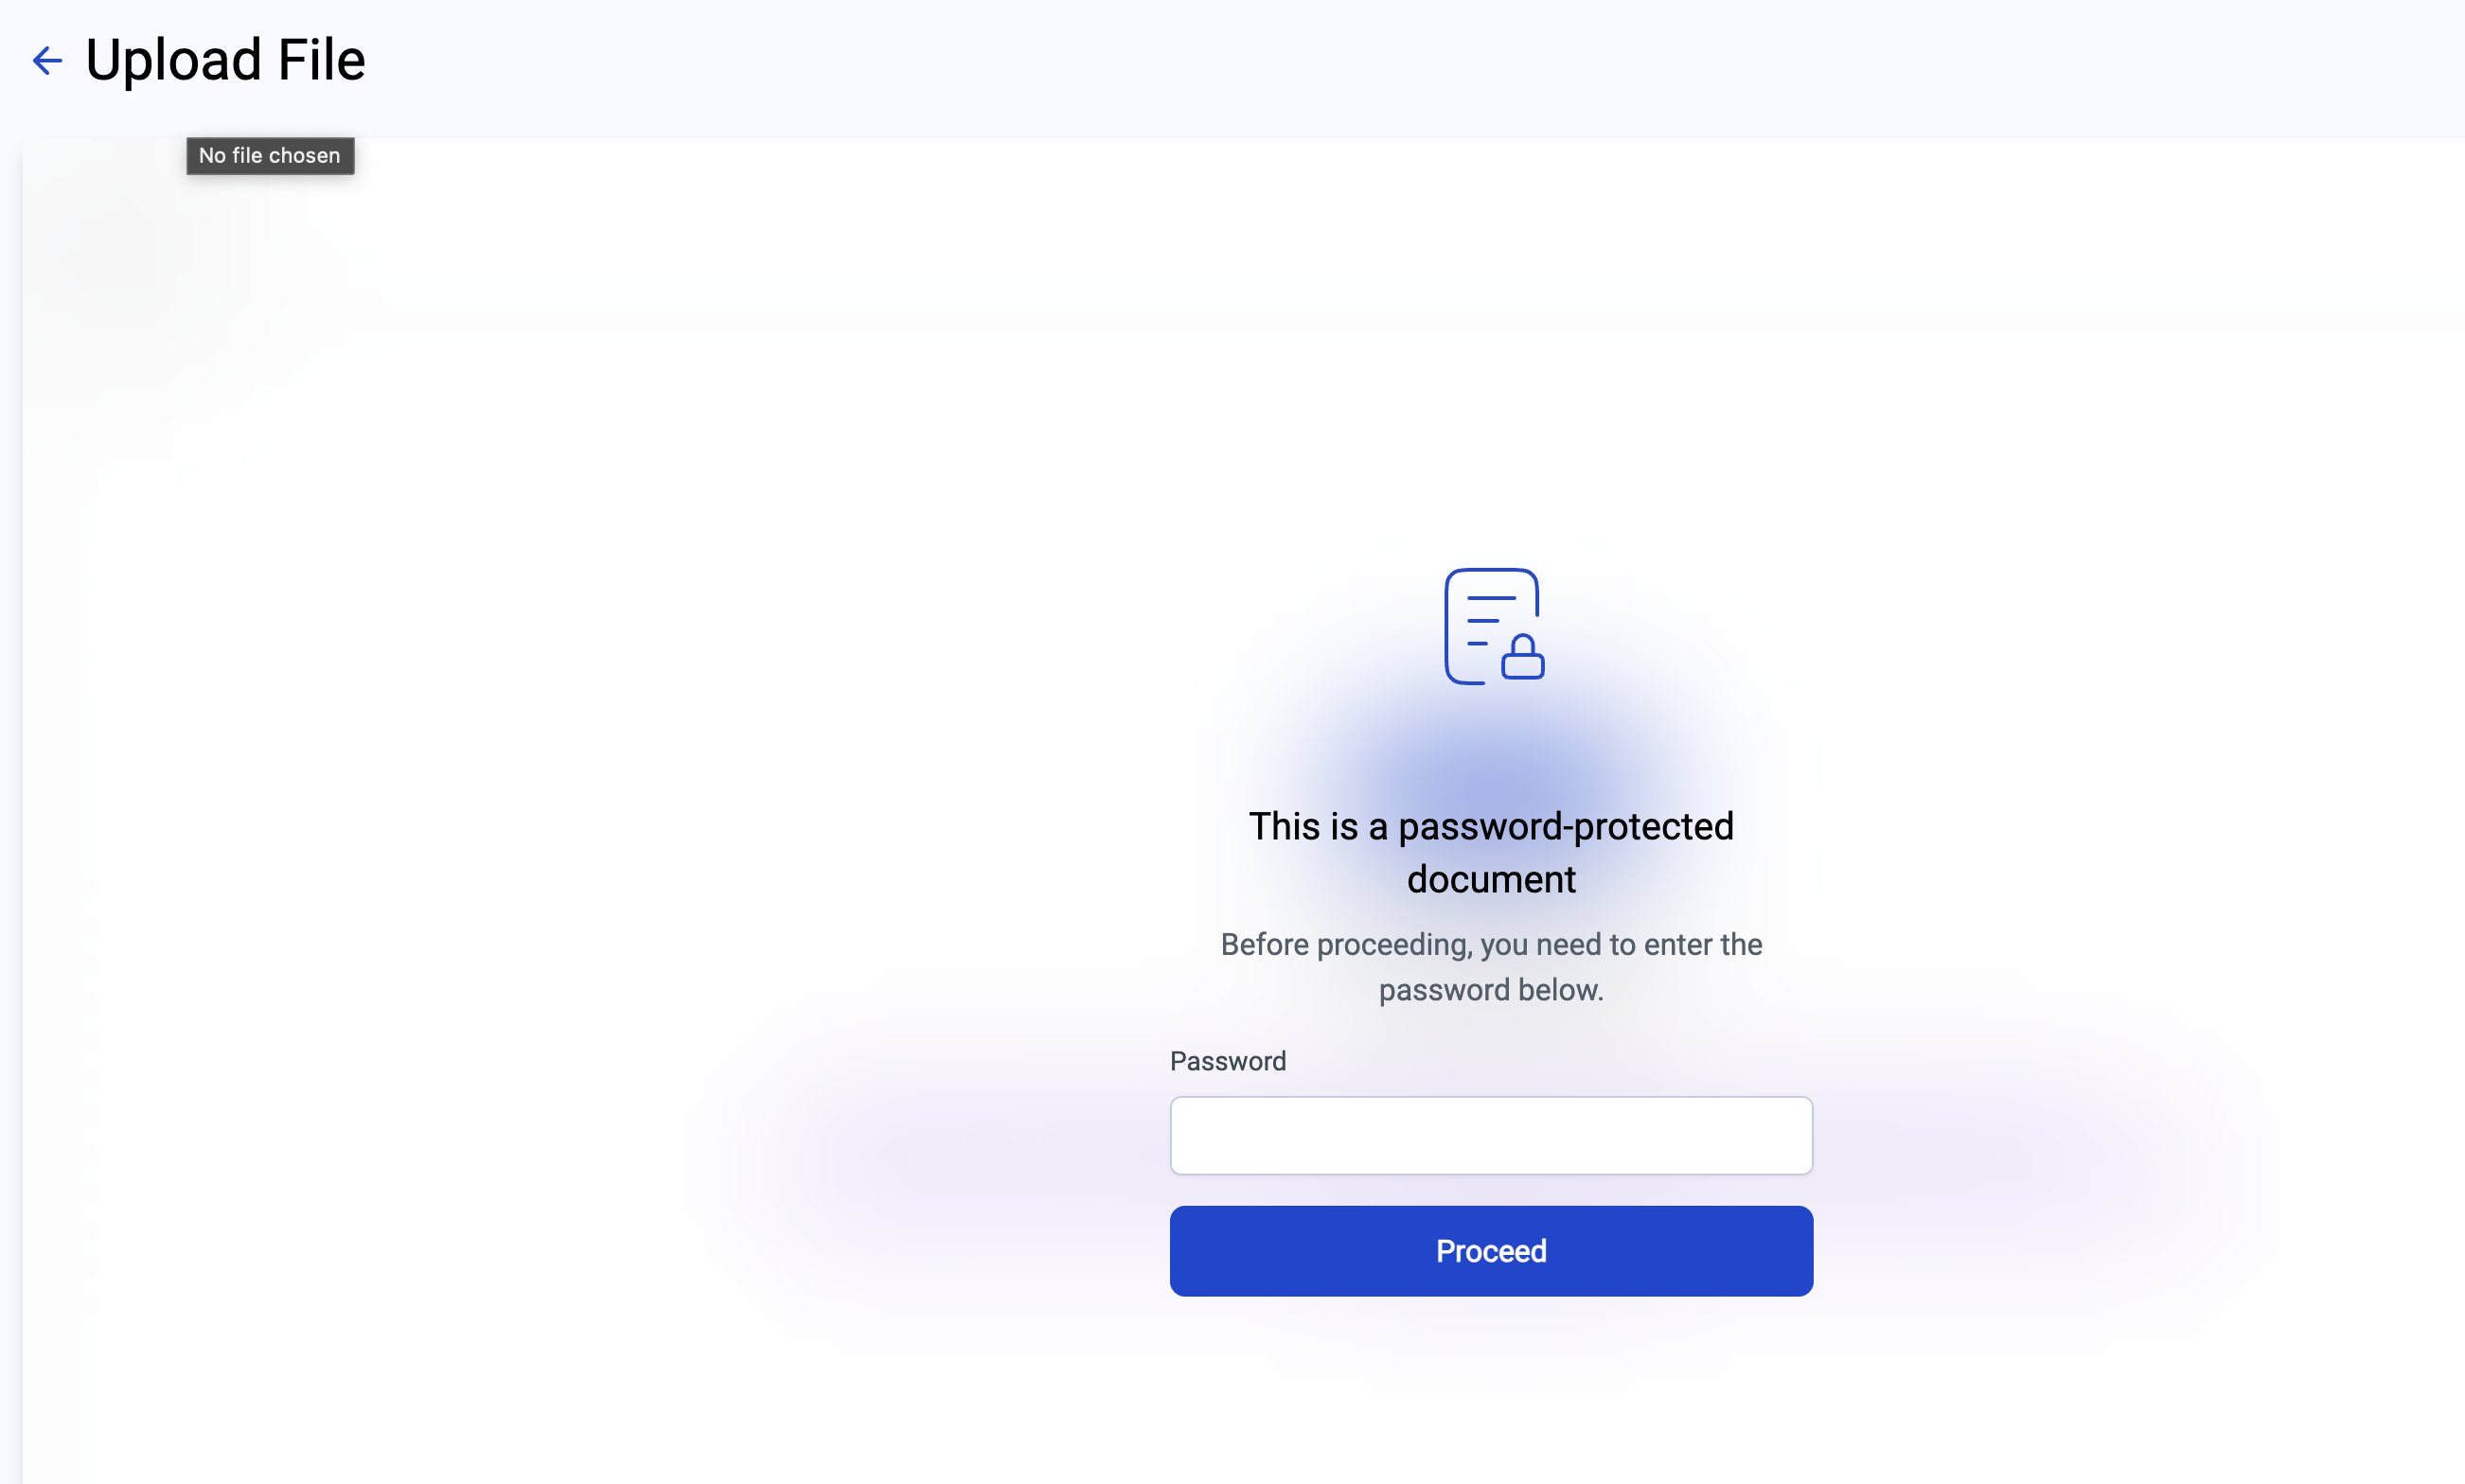
Note: If there is no password, you can leave it blank.
Once uploaded, the bank statement will now be shown in the ledger page in your RevUp Finance account.
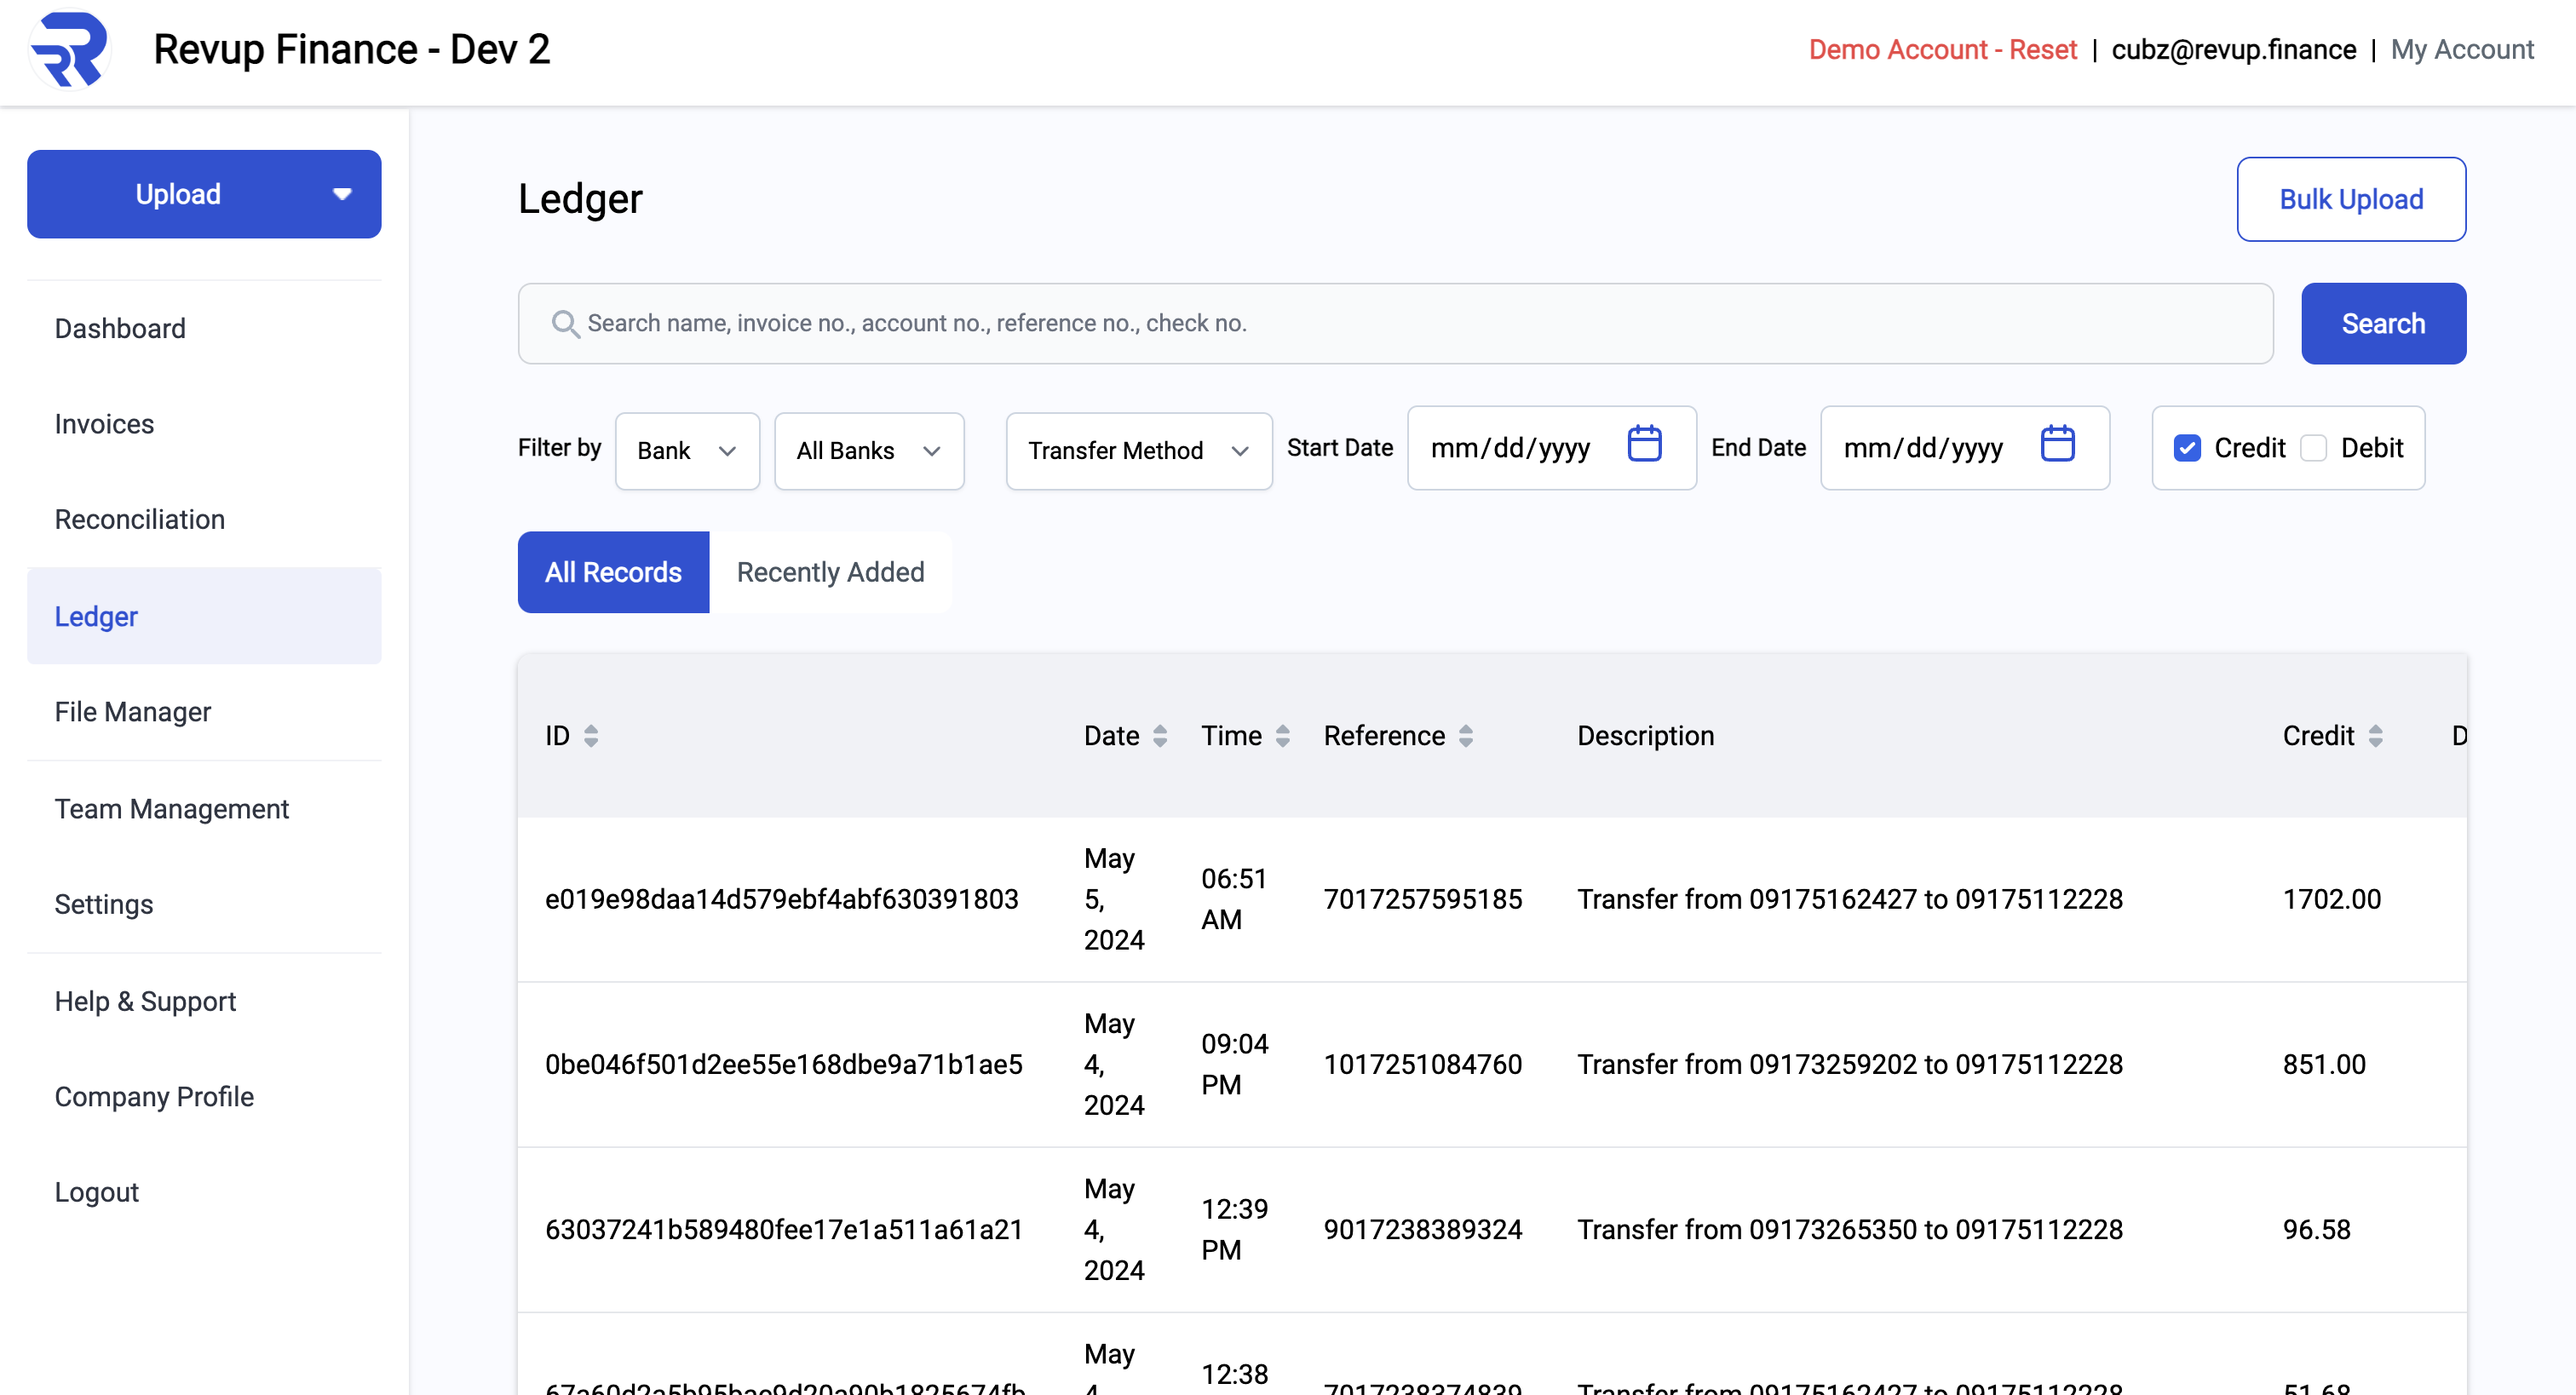
Note: If you have uploaded a different bank statement (e.g. BPI, UBP, etc.), it will consolidate the bank statement into a single record.
Also, upon uploading the bank statement, it will now trigger the bank reconciliation process. Which reflects a new reconciliation record in your RevUp Finance account.
Reconcile Proof of Payment with Bank Statement
Now that you have uploaded a proof of payment and a bank statement, you can now reconcile the proof of payment with the bank statement.
In the portal, you can see the automatically reconciled items in the Recon page. It looks like this:
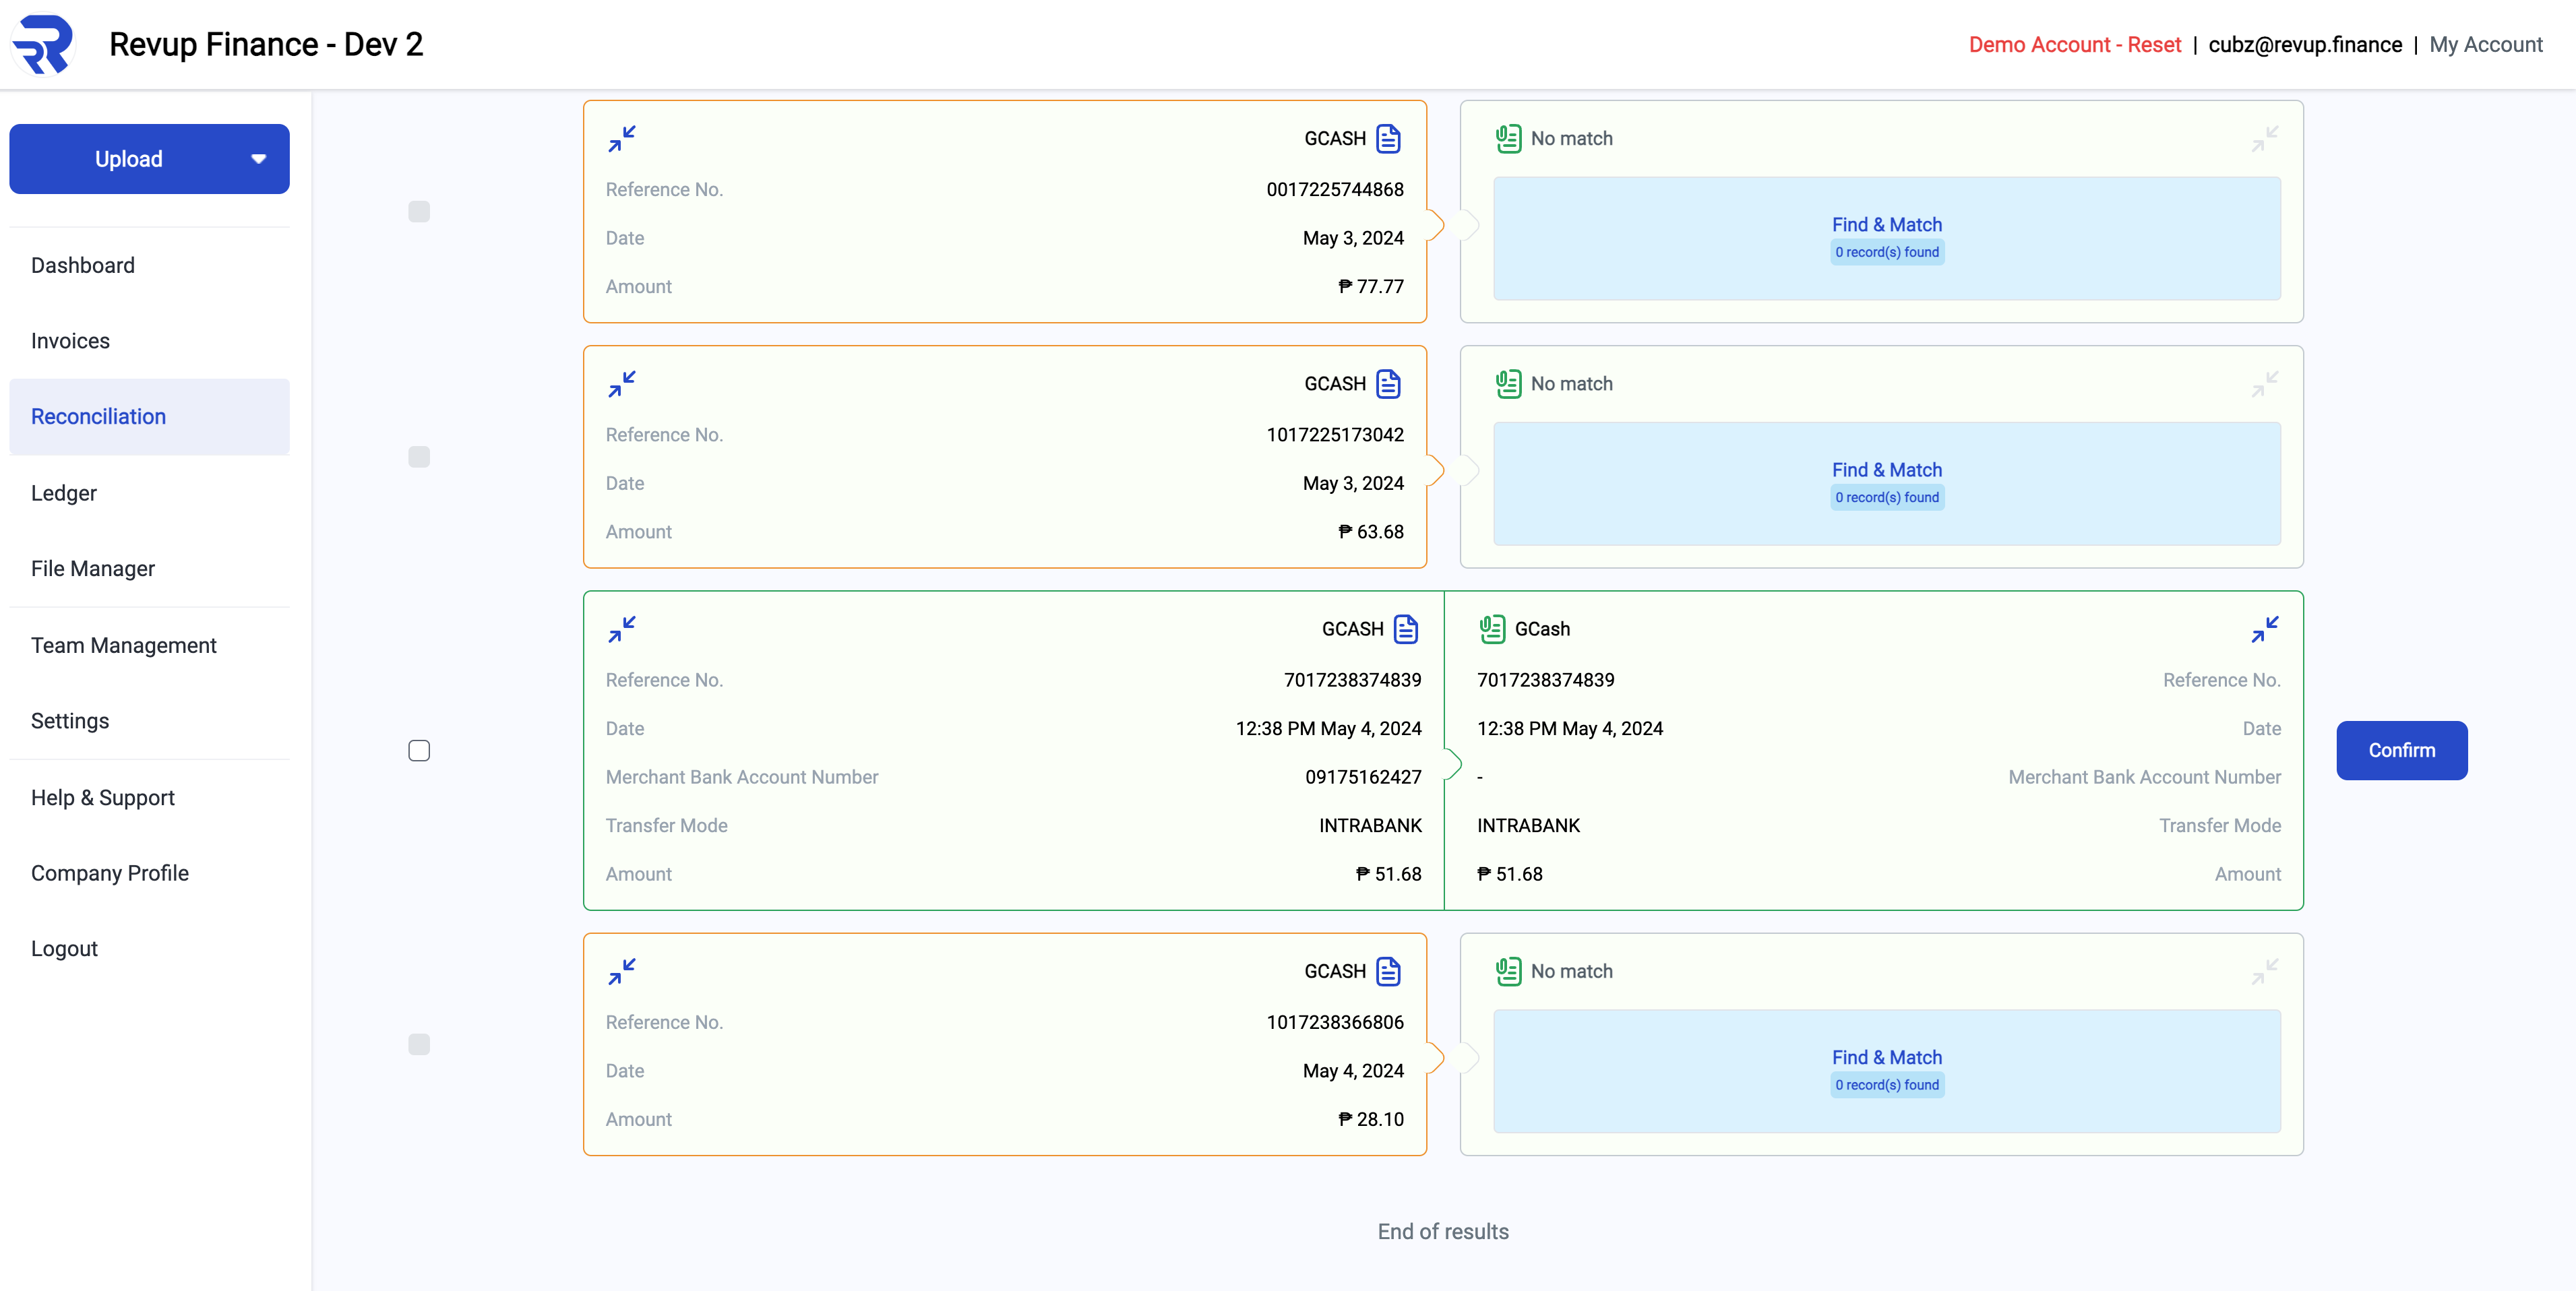
You can just click the Reconcile button to confirm the reconciliation.
Then, in the RevUp Finance portal Ledger page, it will now look like this:
